Now that we have built the frame and& the Y-axis is operational, we can focus on the Z-axis. This will allow to lift the extruder and print new layers. As the layers can be 0.1 mm in thickness we will need a stepper motor that is capable to turning in small steps.
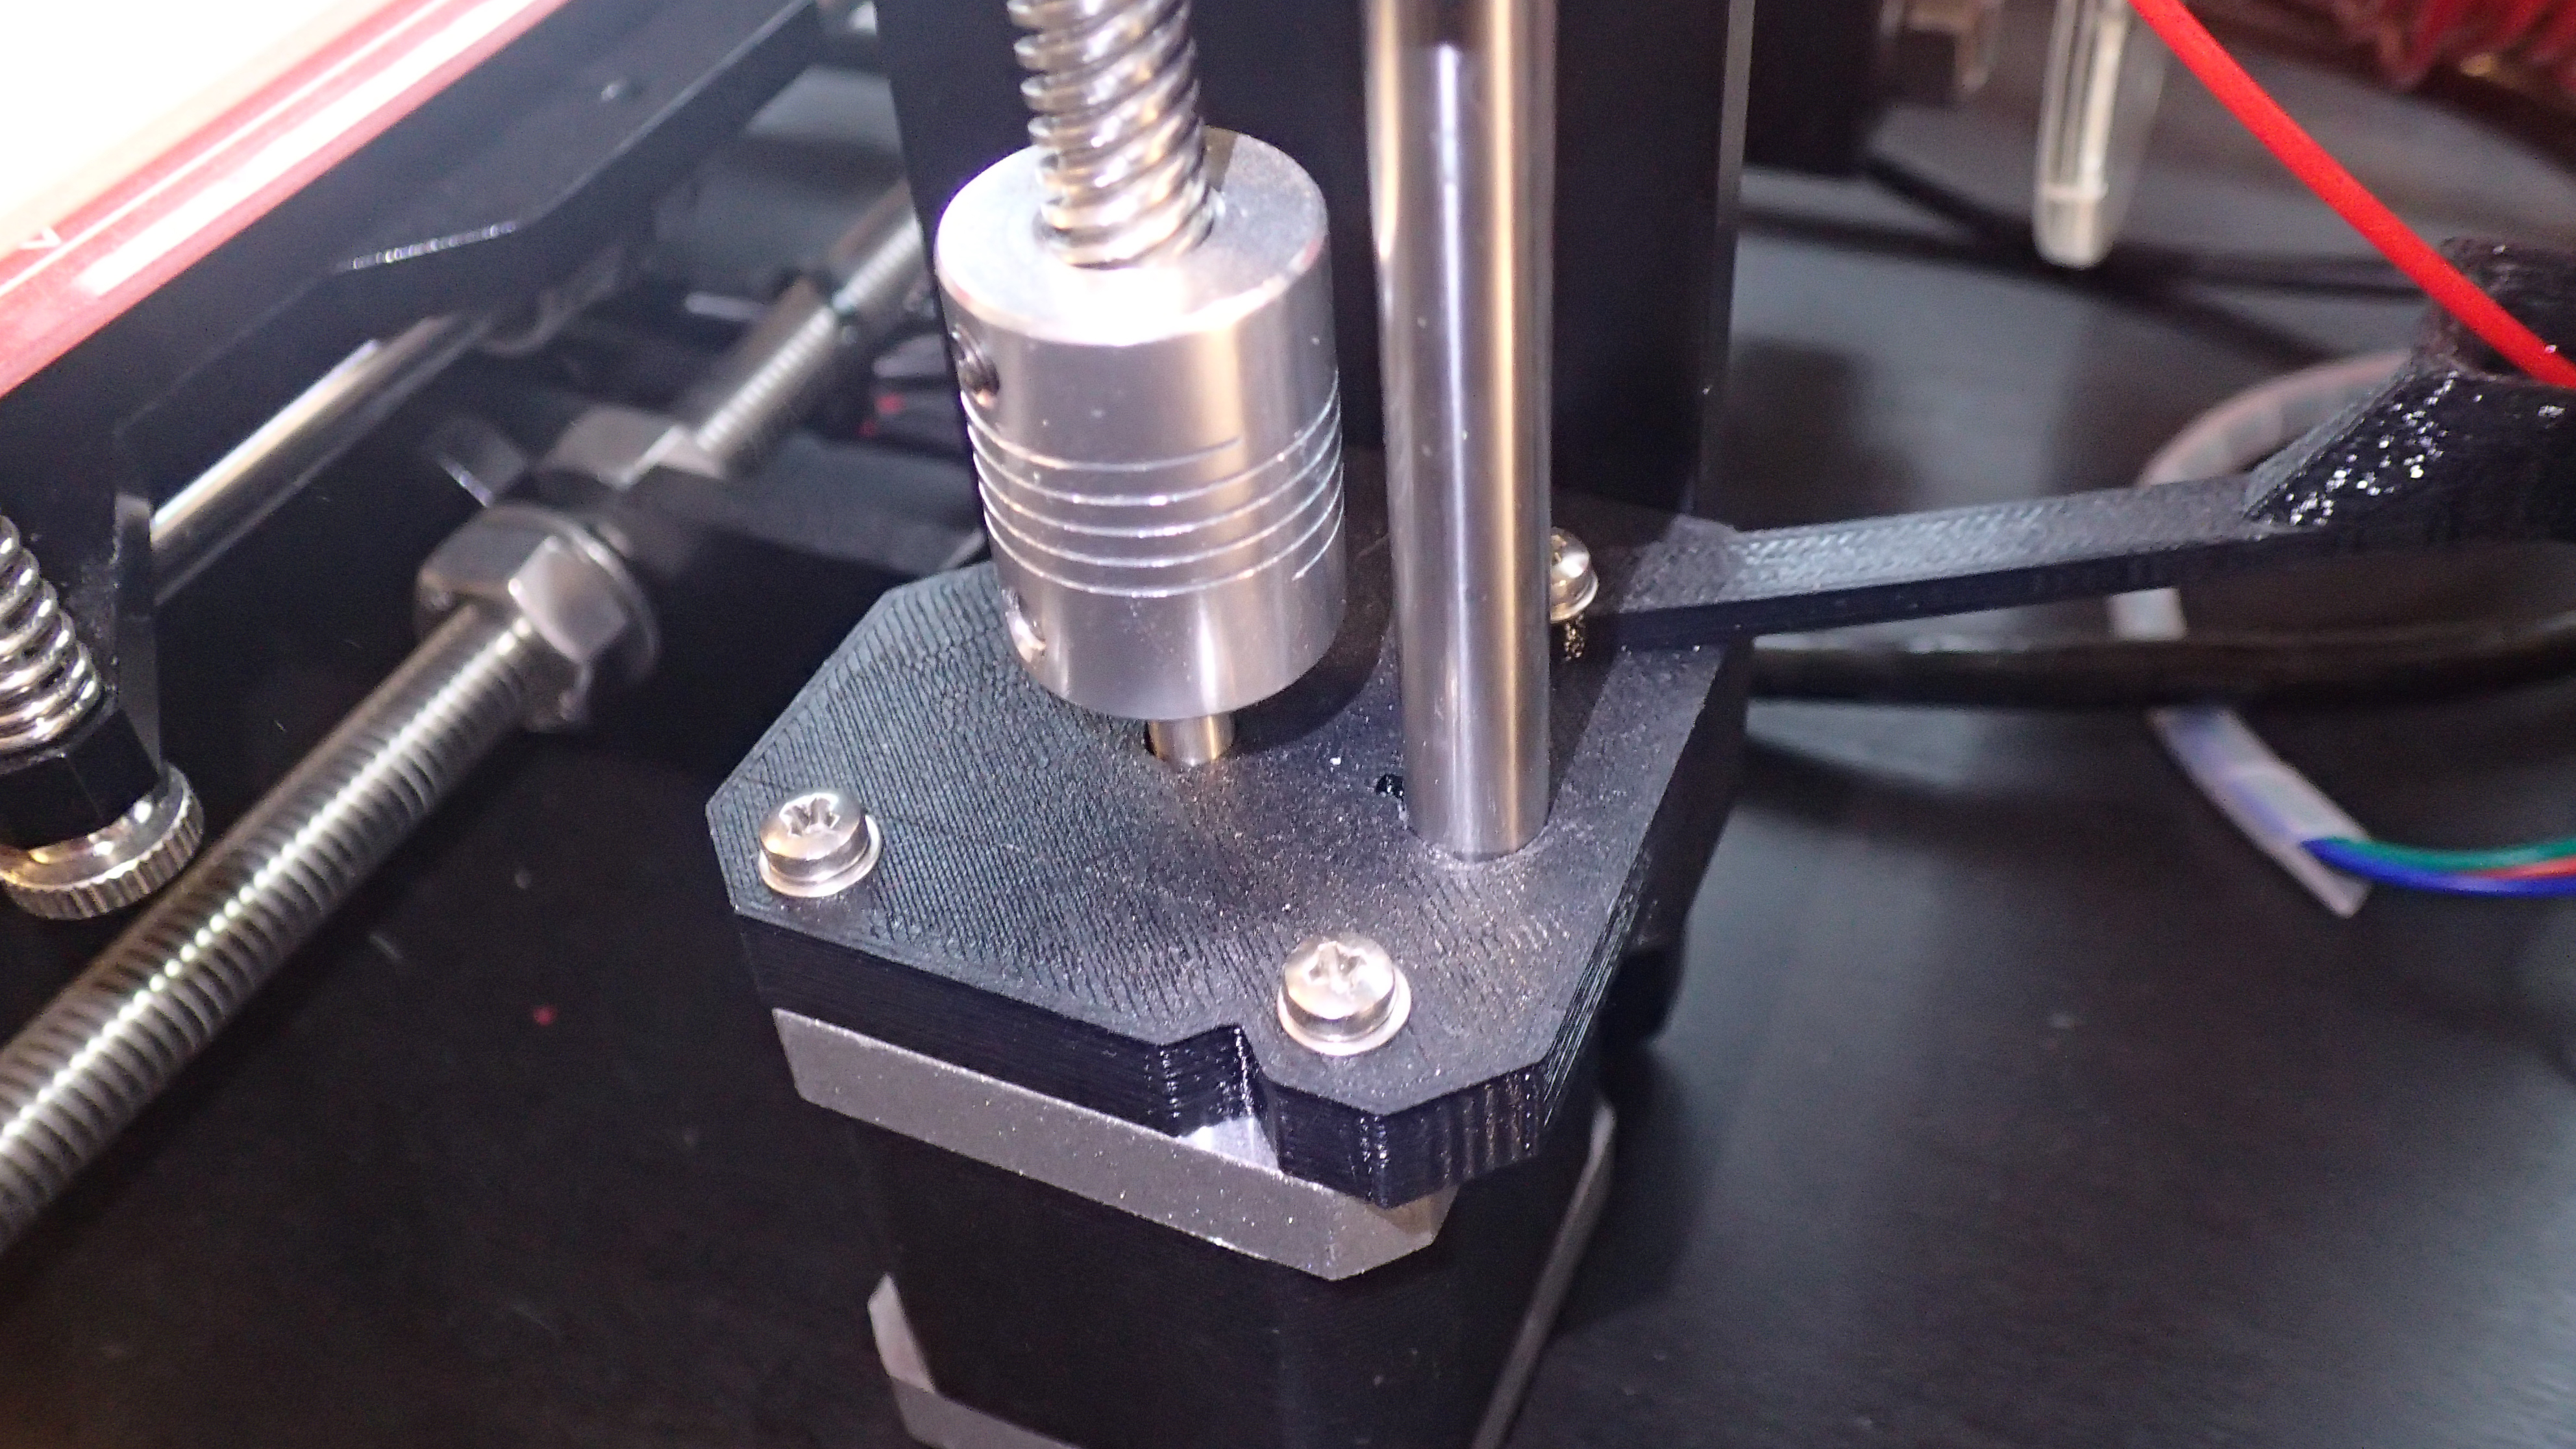
Just as for the Y-axis, the Z-axis stepper motors will be of the same type and resolution. That is 0.9 degrees per step. We will also need 2x lead screws TR8x8 - 30 cm. It means that they will lift the Z-axis 8 mm per full turn of the motor. As the stepper motor has 400 (360 / 0.9) steps per turn we will be able to lift the Z-axis 0.02 mm per step. That is good enough as the usual print is 0.2 mm per layer. To connect the stepper motor shaft to the lead screw you will need flexible motor coupling 5 to 8 mm.
To attach the Z-axis stepper to the 6mm aluminum frame we will need a printed part. The standard part of the Prusa i3 Rework set is of less stability than this motor mount for Z-Axis. To sum up the things needed:
- 2x lead screws TR8x8 - 30 cm
- 2x flexible motor coupling 5 to 8 mm
- 2x NEMA 17 HR 0.9 degrees per step 4.0 kg/cm stepper motor. Part number: 42BYGHM809
- 14x M3 x 12mm screws
- 20x M3 washers
- 6x M3 nuts
- 3D printed motor mounts for Z-Axis (left and right)

In the next part we will cover the construction of the X-axis and connect it to the Z-axis, just like in the picture above.