This blog post covers how to upgrade your hard disk in a soft-modded OG Xbox to 2TB. It assumes that your system is already soft-modded. Check my previous post if you would like to read about this process.
You will need:
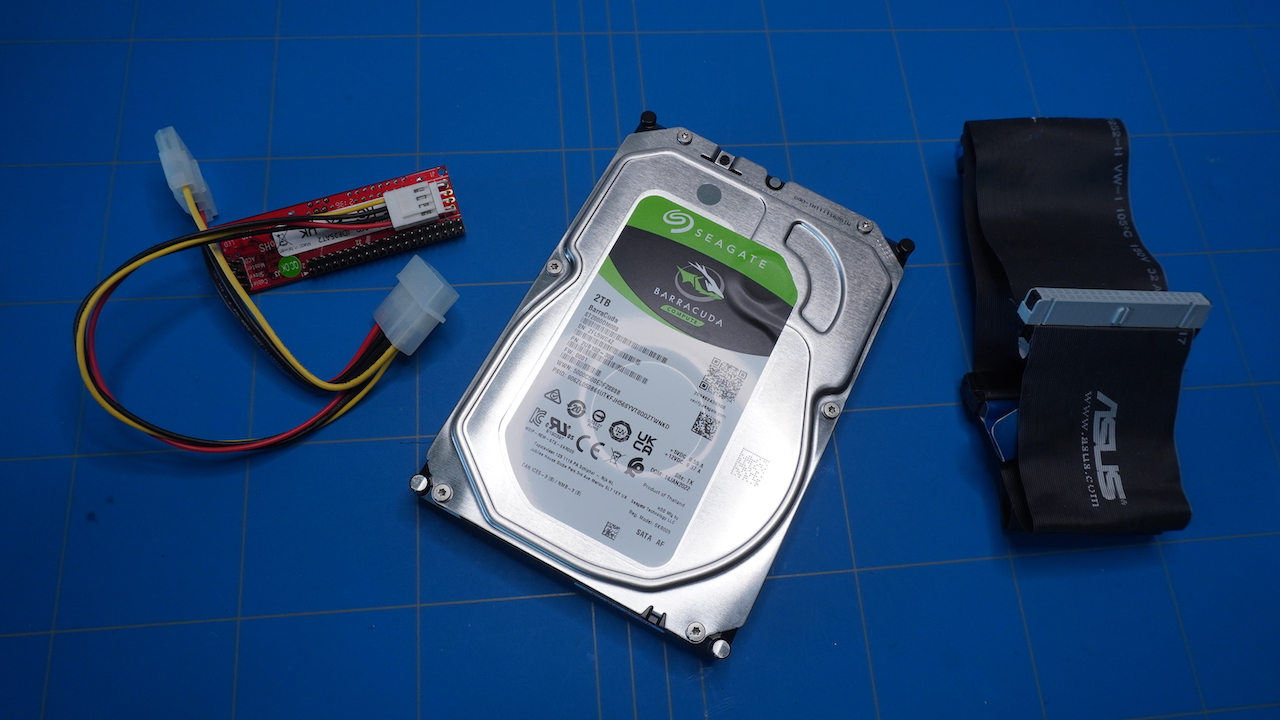
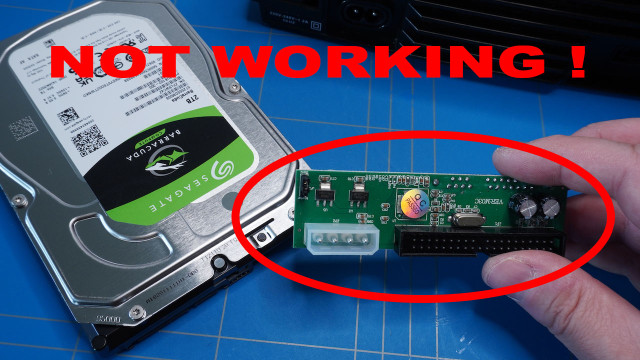
- Large hard disk. Initially, I used a Seagate Baracuda 2TB SATA hard disk (ST2000DM008), but you can also use an IDE hard disk. Check this compatibility chart, before getting one. Make sure it allows locking.
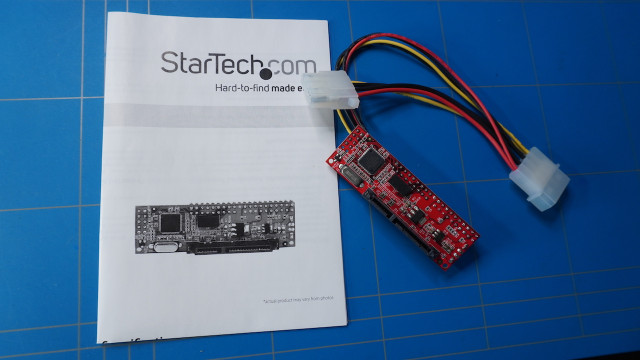
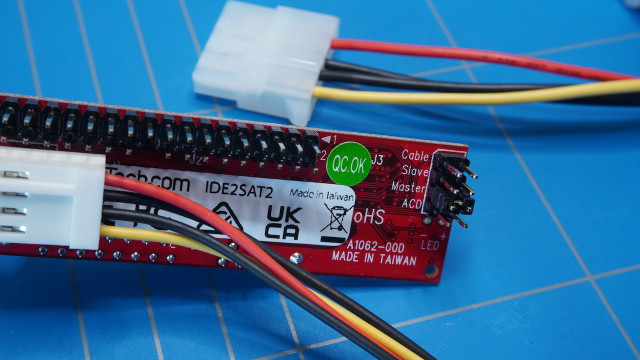
- If you are using a SATA hard drive you will need a StarTech.com IDE to SATA. This adapter is also supplied with a Y-Splitter Molex Cable, so you will not need to buy a separate one.
- Hi-Speed Ultra ATA UDMA 33/66/100 80-wire 40Pin IDE Data Extension Cable 40cm. You will not need it when using a standard IDE hard disk, only SATA.
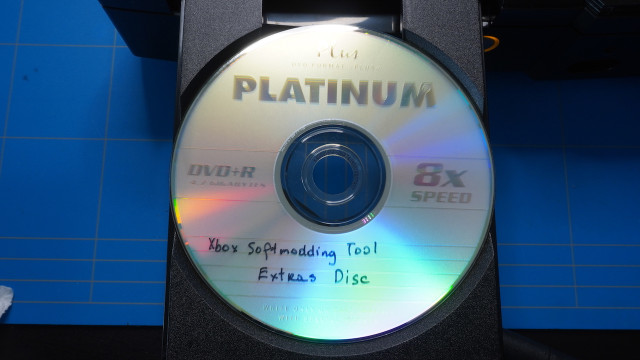
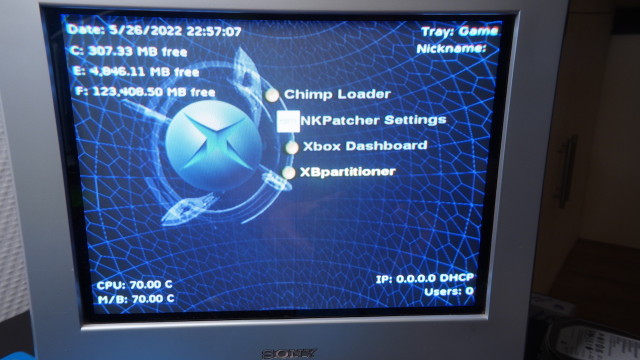
Before we start we will first install some software that is needed on our softmodded Xbox. If you have followed my previous blog post on softmodding an Xbox you should already have a prepared Xbox Softmodding Tool - Extras Disk DVD. Insert it now.
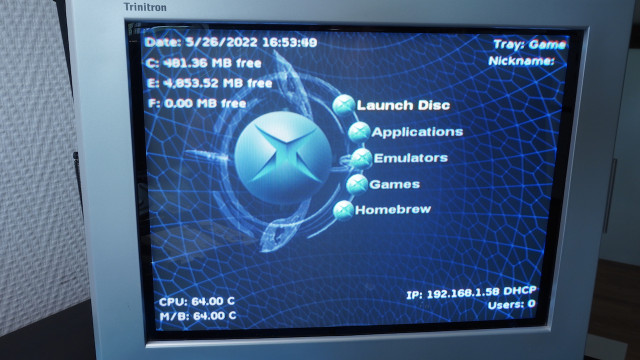
On your Xbox select Launch Disk menu item.
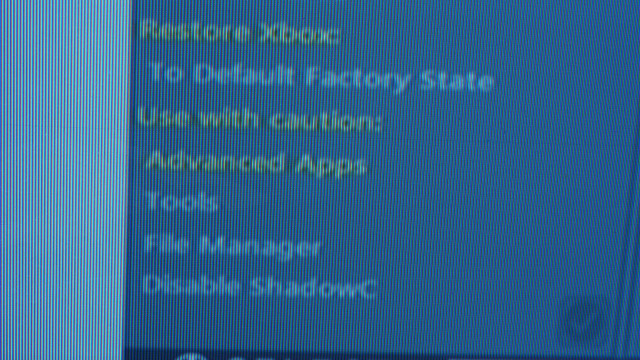
Once the Xbox softmodding tool is started, navigate to Advanced Menu and Enter menu.
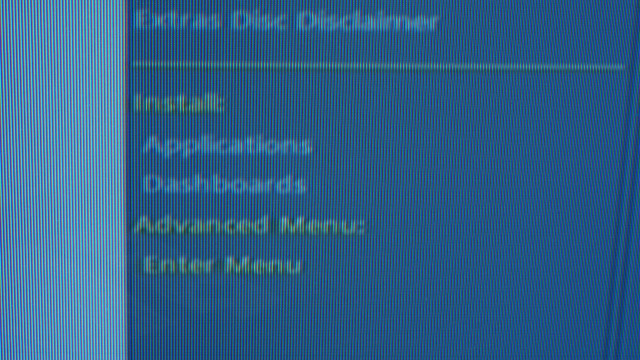
Then select Advanced Apps.
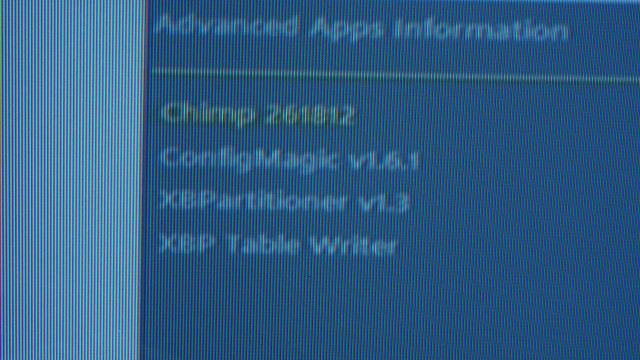
Select: Chimp 261812.
And then install it by choosing: Install Chimp 261812.
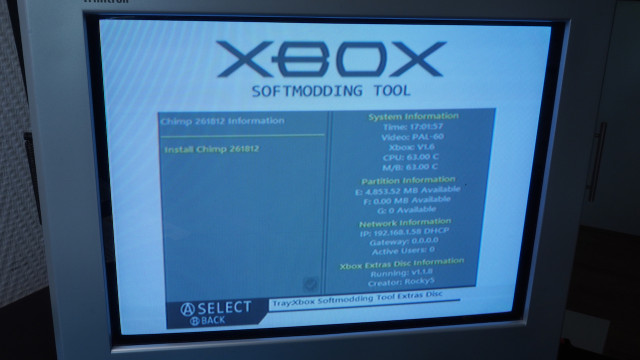
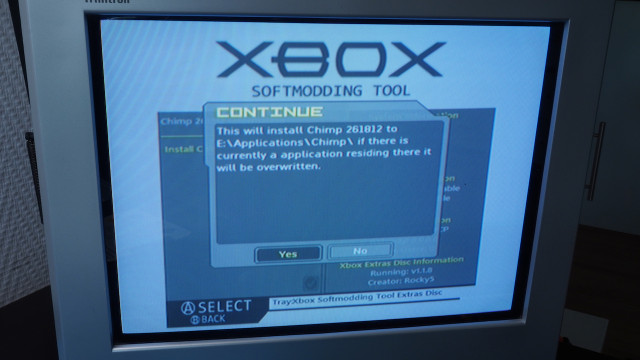
This will prompt you to install Chimp inside the directory E:\Applications\Chimp. Press A and wait until it's installed.
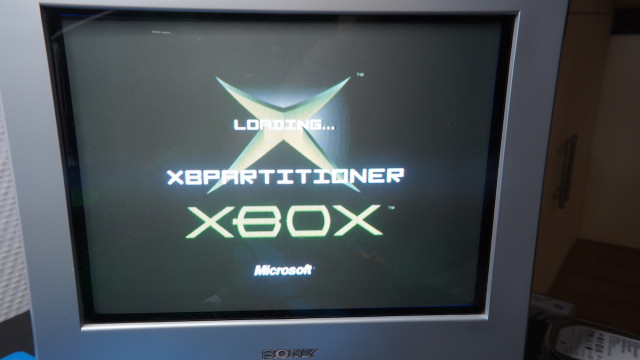
We will also need to install XBPartitioner as this will help us partition the 2TB hard drive. I did not take pictures of the process, but the steps are the same as installing Chimp. The application is listed inside the Advanced Apps menu. When the process is complete you should see XBpartinoner appear next to the Chimp Loader. You can now remove the Extras Disc DVD and turn off your Xbox.
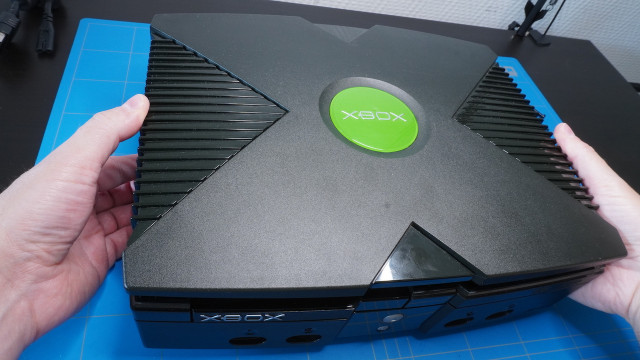
Now, we will need to open up the Xbox. Flip it on the back. There are 6 screws that we will need to remove.
Four of them are located on the corners under the rubber pads. Lift them slightly and use a Torx T20 bit to remove them.
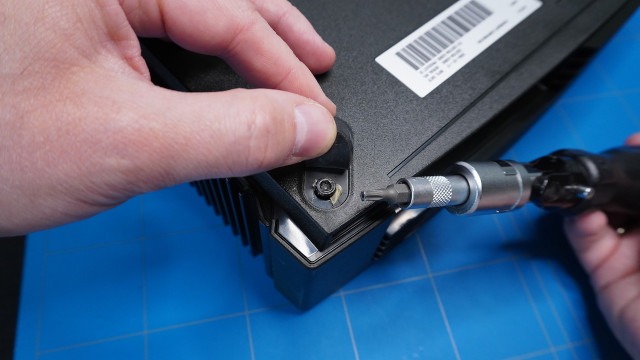
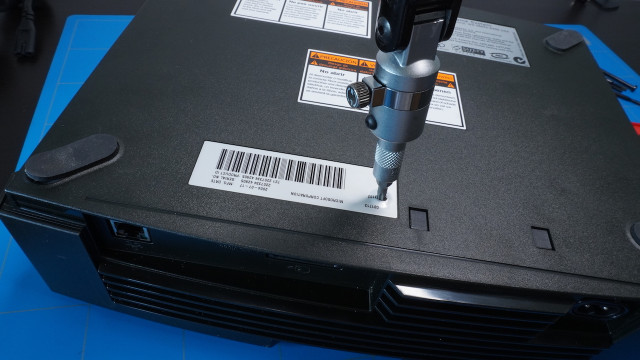
The last 2 screws are hidden under the stickers. If you don't want to punch holes, you can lift them using a heat gun.
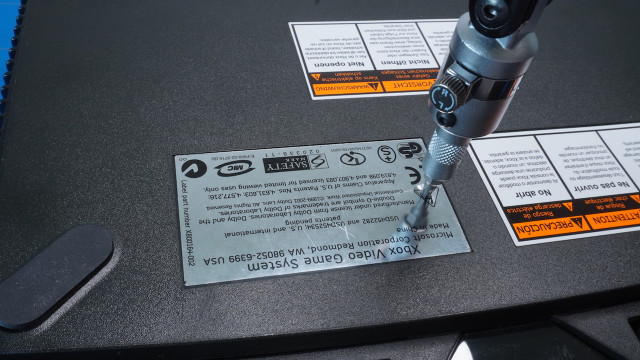
Location of the last screw.
After that, you can open the Xbox by gently lifting the cover.
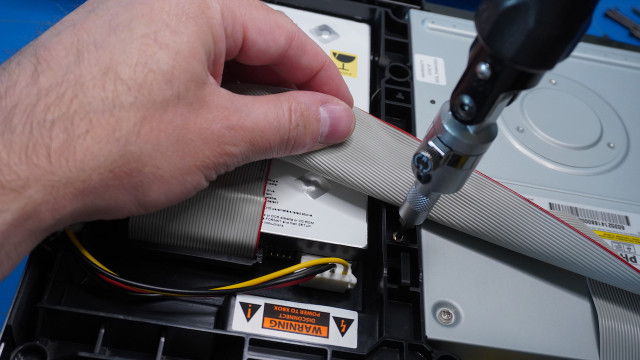
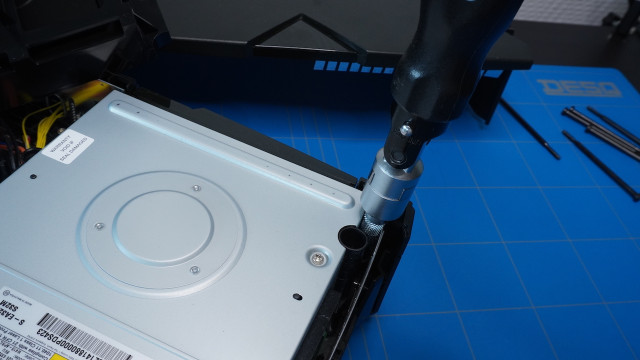
You must also remove 3x T10 Torx screws that hold the DVD-ROM drive and hard disk bracket in place. The first one is located under the ribbon cable.
The other two are located on the front corners of the drive. The first one is here:
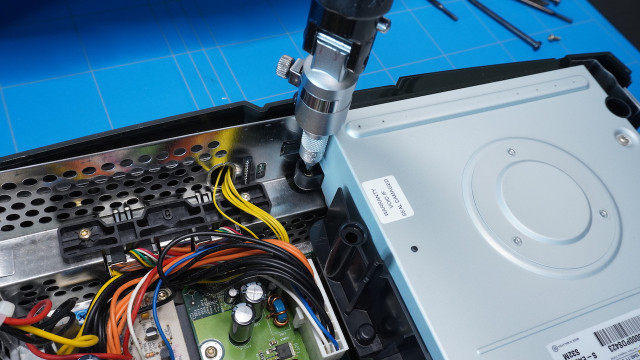
And the second one here:
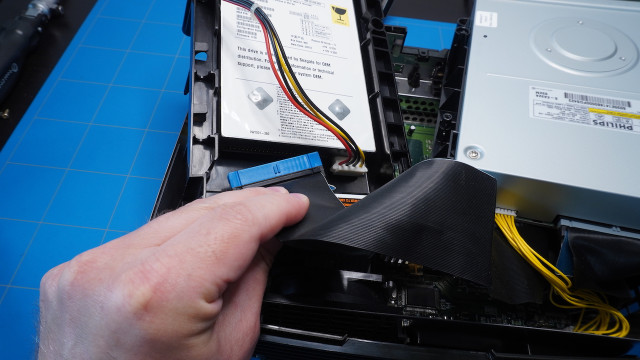
You can remove the IDE and the power cable from the hard drive
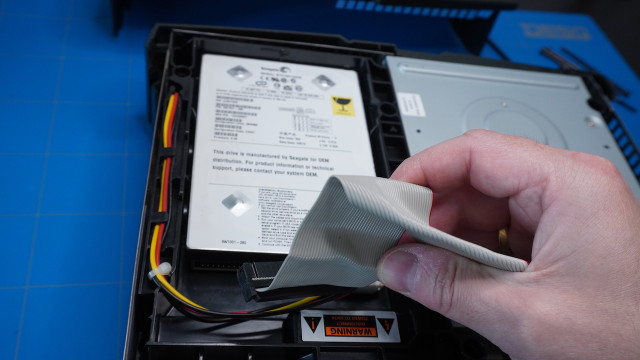
and lift the bracket.
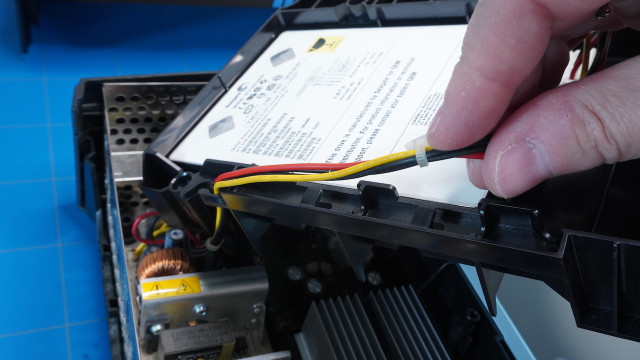
Remove the old IDE 40-wire cable from the hard drive
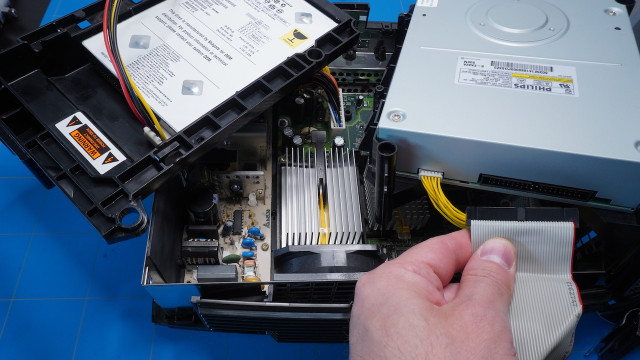
And replace it with the 80-wire Ultra ATA cable. You will need to lifp the DVD player to reach the connector on the motherboard.
Prepare the IDE to SATA adapter. This adapter is supplied with a Y-splitter Molex cable.
I have also tried this IDE to SATA adapter, but it did not work on my Xbox.
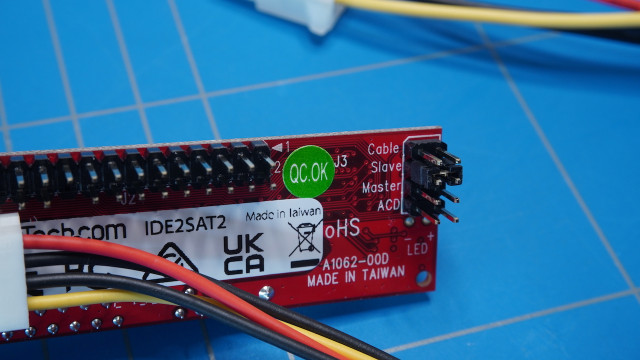
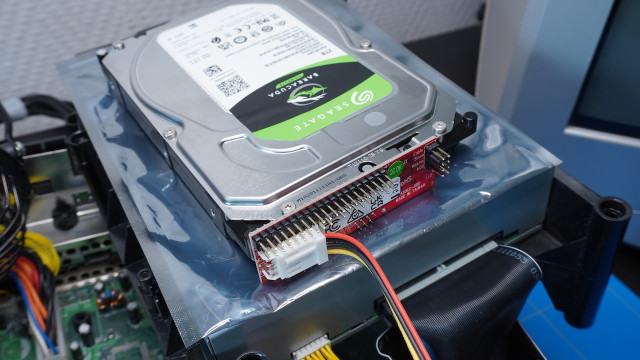
Set the jumper on the IDE to SATA adapter to the Slave position and connect it to the 2TB SATA hard disk.
Now place the hard disk on top of the DVD-ROM. It's best to insulate the space between them with an antistatic bag. The next step is crucial. You will need to hot-swap the IDE cable from the DVD drive to the hard disk while the power is on. You have only a few seconds to do it otherwise, the procedure will fail! It is best to practice this swap for a couple of times while the power is still off.
Turn on your Xbox and wait for 5 minutes while inside the dashboard so that the drives will initialize properly.
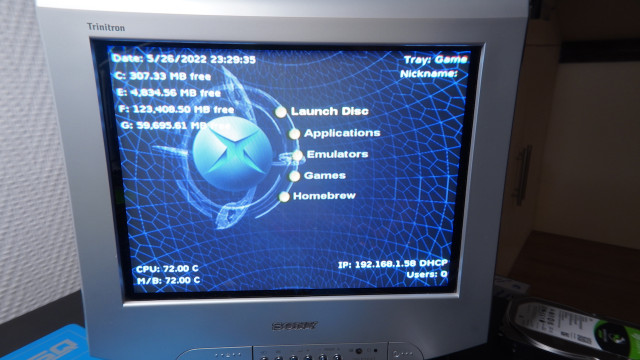
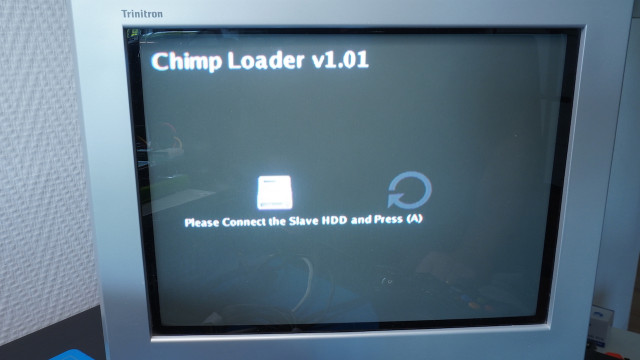
Then navigate to the Applications menu and launch Chimp Loader. A message will appear that you will have to connect the Slave HDD. This is the time when you will perform the hot swap as described above. Remember that you only have a couple of seconds to do so!
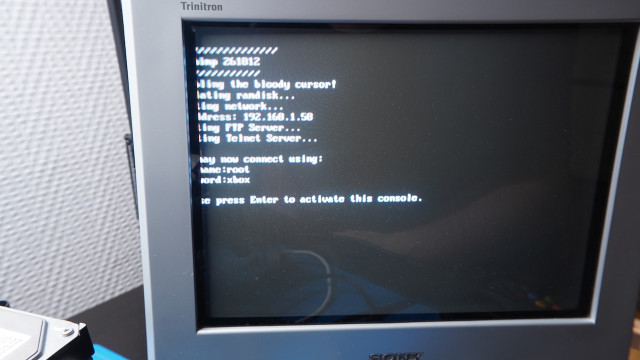
You will get a message to press Enter to activate this console. Since we don't have the Enter key, we press the A button on our controller.
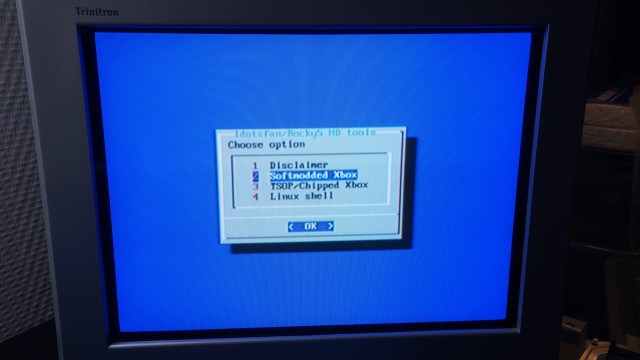
Now use the D-pad to select the Softmodded Xbox menu item and press the A button on the controller.
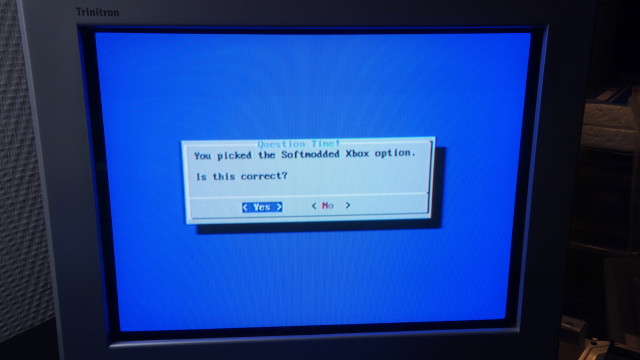
Select Yes to accept.
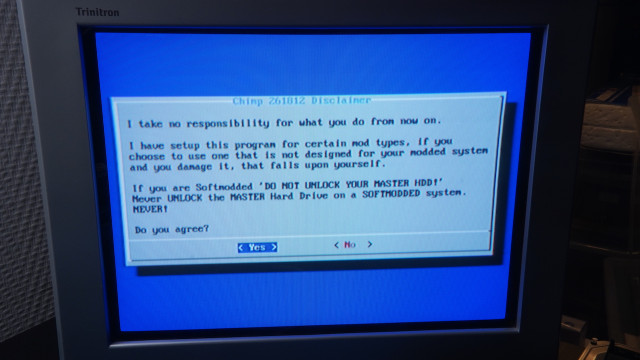
And (if you agree) select Yes for the second time. This screen also warns you that you should never unlock the master hard drive on a softmodded Xbox.
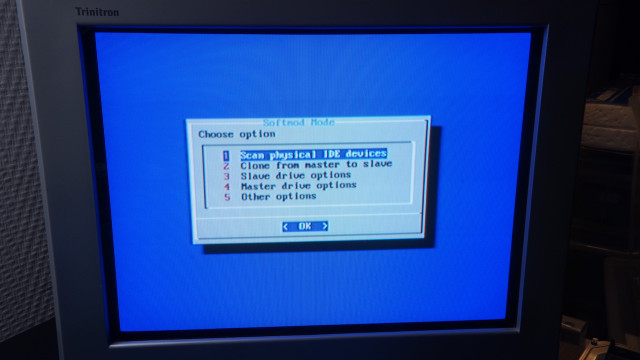
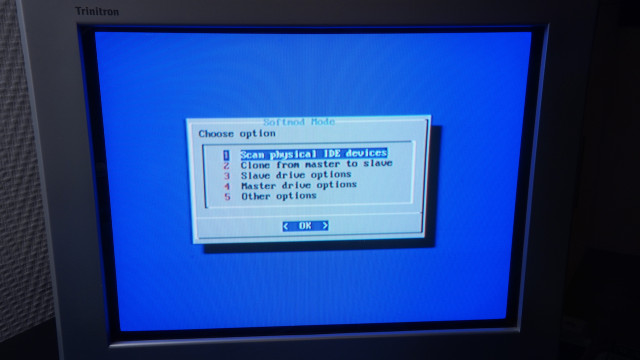
Then select option 1 to Scan IDE drives.
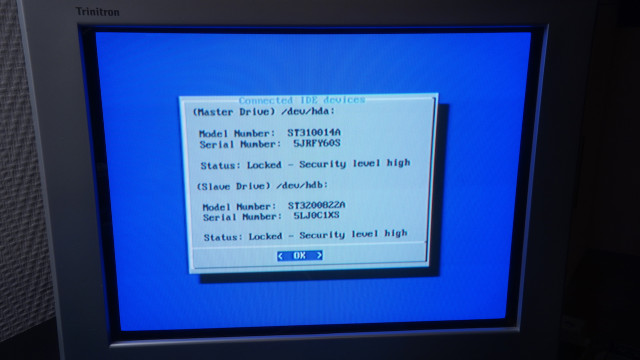
The next screen shows what hard drives are connected. The one on top (master) is the original Xbox drive and the one on the bottom (slave) is our new 2TB SATA drive. At this point, the slave hard drive is still unlocked, but this will change after we are done with the cloning process. We are all set. Press OK to continue.
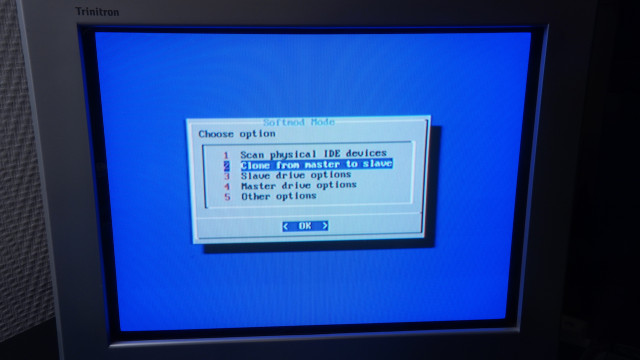
Now select option 2. Clone from Master to Slave.
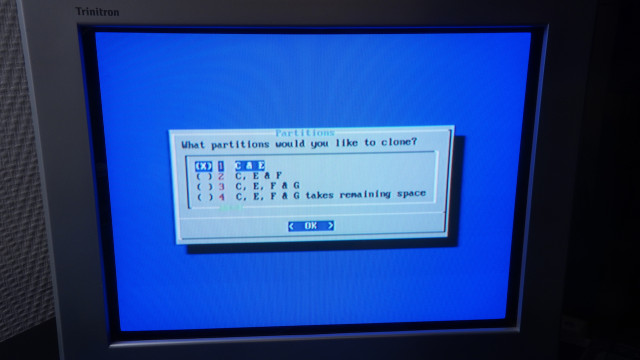
Choose Selective (Select Partitions) here. This option should be selected as default, if it's not you can press the X button on the controller to select it. Then press the A button to continue.

Select C & E partitions. The other options are not relevant here. They are for cloned drives that have already more than the default C & E partitions.
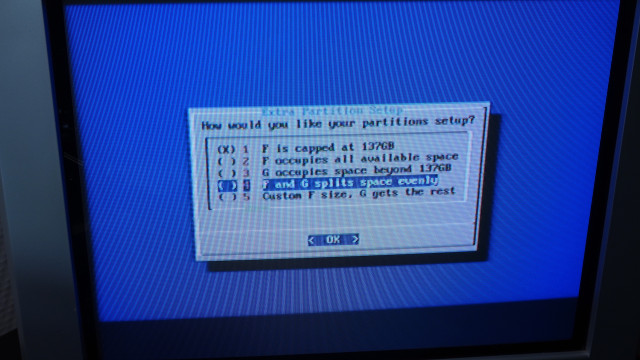
Select now the option to split space evenly between F and G drives. This will give us 2 drives where we can put the backups of our OG Xbox games. Press the X button to select it and A to confirm it.
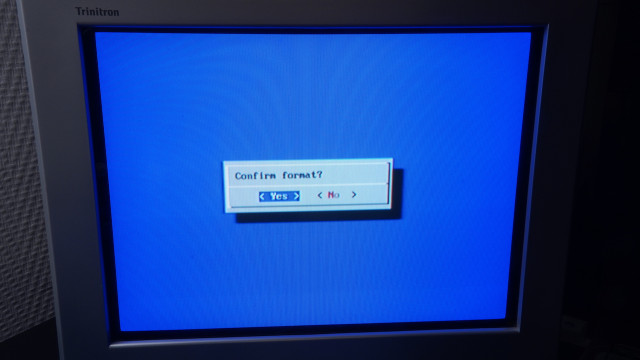
Confirm the format by selecting Yes.
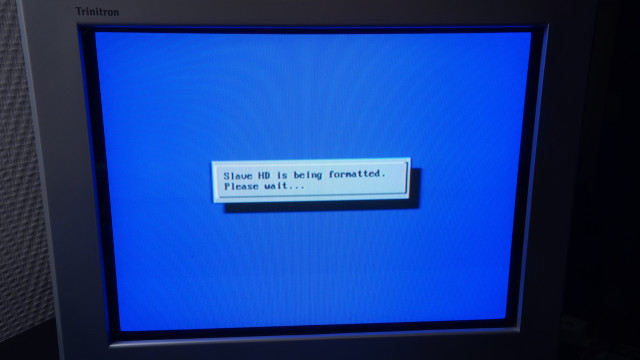
The drive will now be formatted.
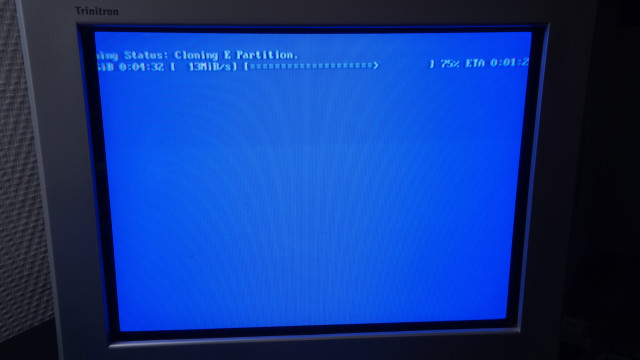
And the partitions C & E will be cloned to the new drive.
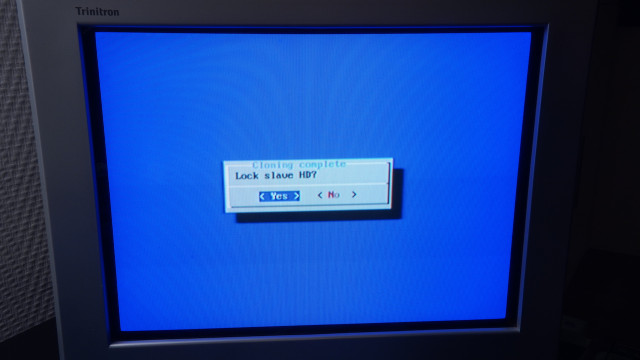
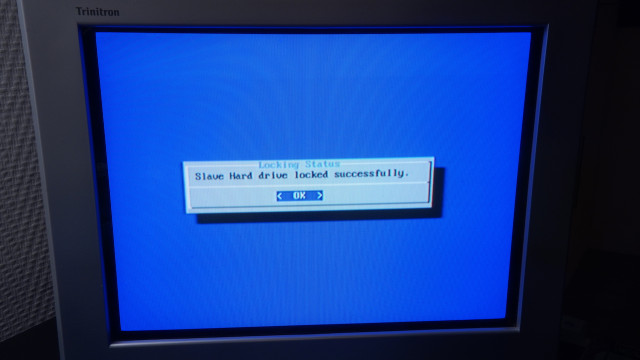
When the cloning process is complete you will have to lock your drive. Select Yes here.
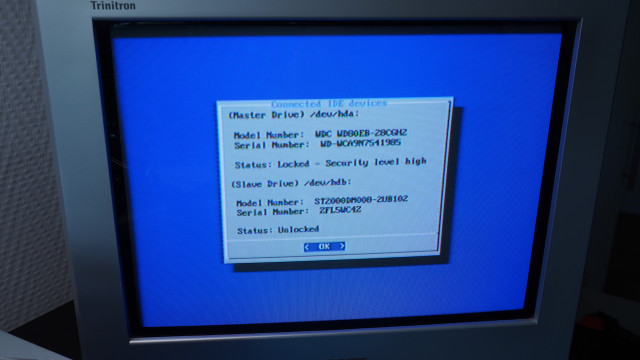
You should get a message that the slave drive is locked successfully.
If you wish to do a check. You can do that by choosing the option to Scan Physical IDE devices.
And this overview should be displayed, showing that the slave drive is locked.
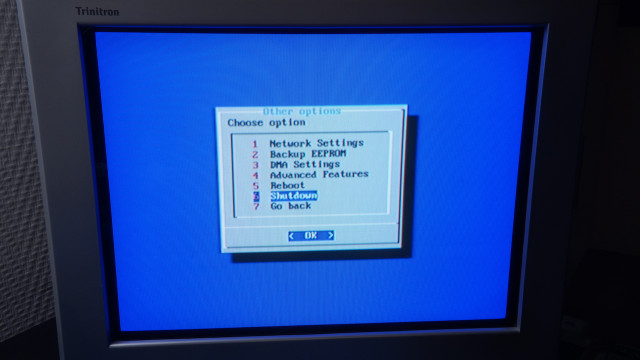
Congratulations! At this point, you are done. You can select Other options.
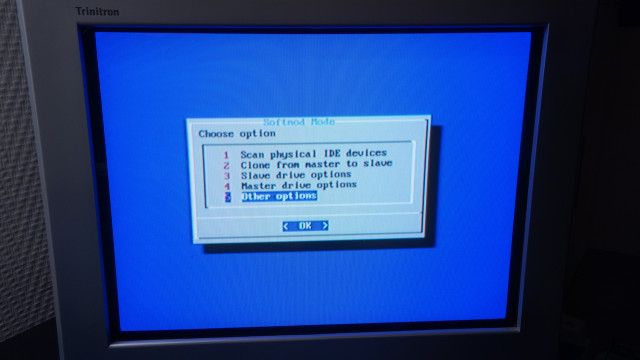
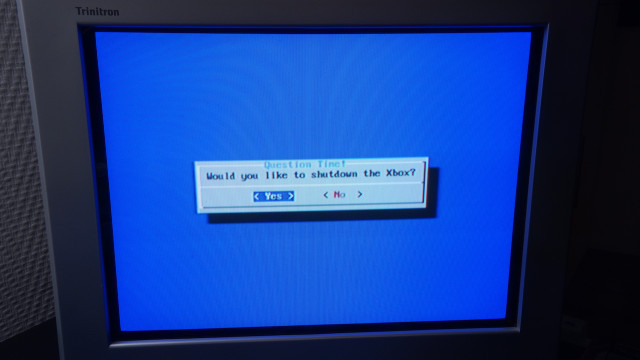
And shut down the Xbox.
A final message will be shown where you can confirm that and then the Xbox should turn off.
You can now unplug the old drive and change the jumper on the IDE to SATA controller to master.
Your Xbox should start with F and G partitions. To change their size, you can use the XBpartitioner tool, which is located in the Applications menu.
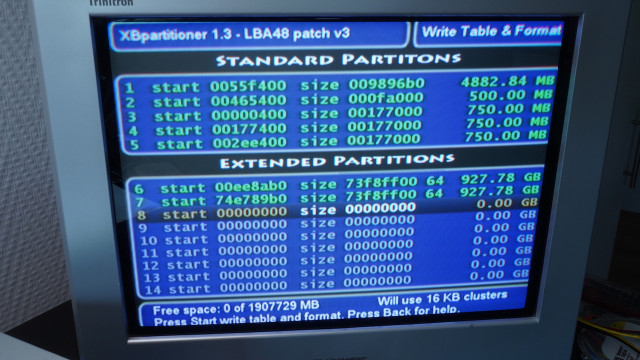
This is the overview of the partitions that I have set up. F and G are the extended partitions. They are now empty so they can be changed freely. However, do not touch the standard partitions as they contain the data that we have cloned from the old hard disk. The changed partitions will be shown in yellow text.
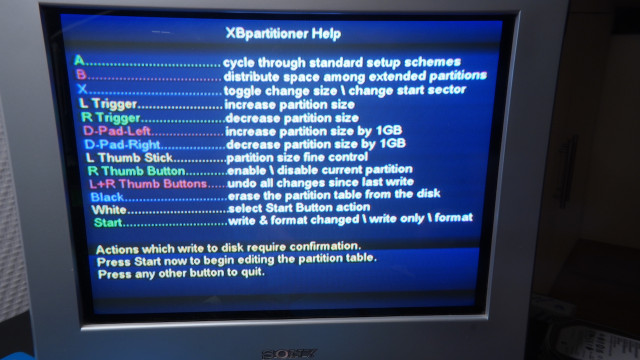
While inside this application press the back button of your controller to show the help screen with all the commands. The B button can distribute the space among the extended partitions.
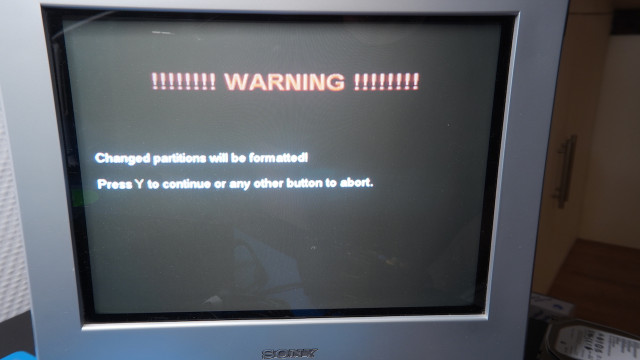
Pressing the Start button will change and format the partitions on your hard drive.
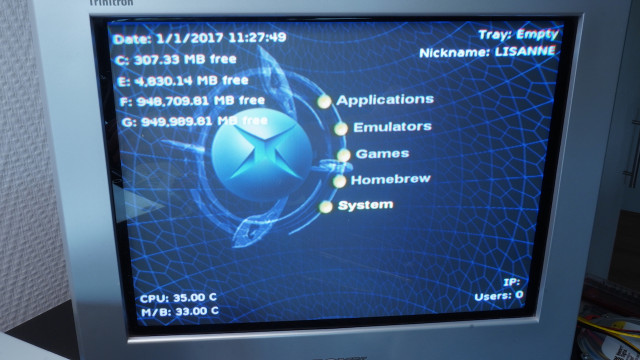
After restarting your system you should see the correct division of the F and G partitions.
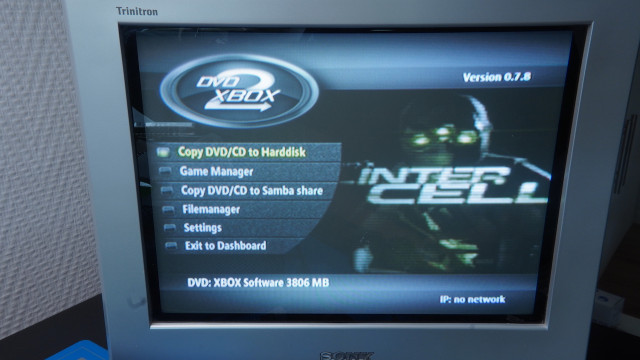
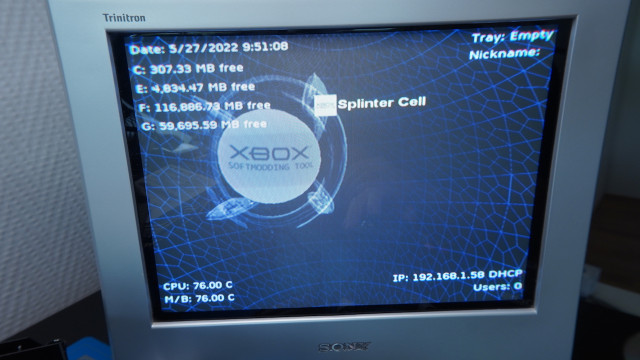
Right now you can backup your games to the hard drive. I will show the process for the Splinter Cell game.
On the Xbox Softmodding Tool - Extras Disk DVD there is a tool that is called DVD2Xbox.
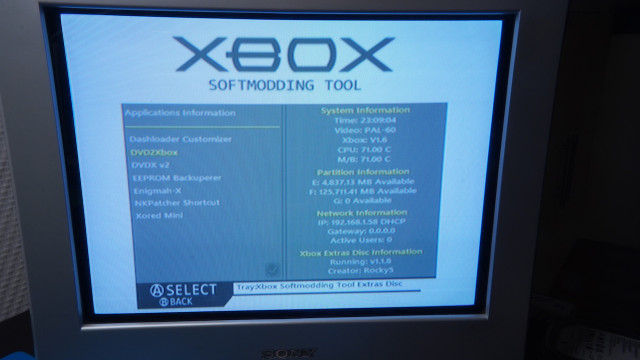
You can install it on the E: drive.
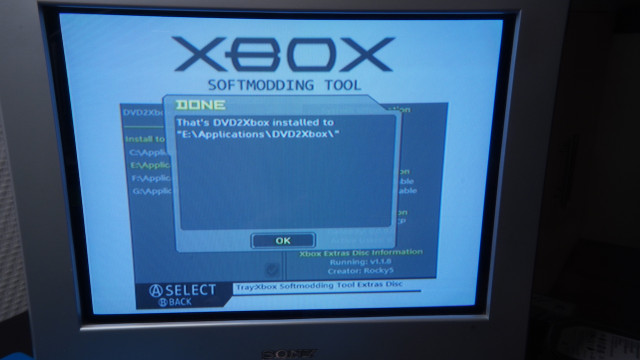
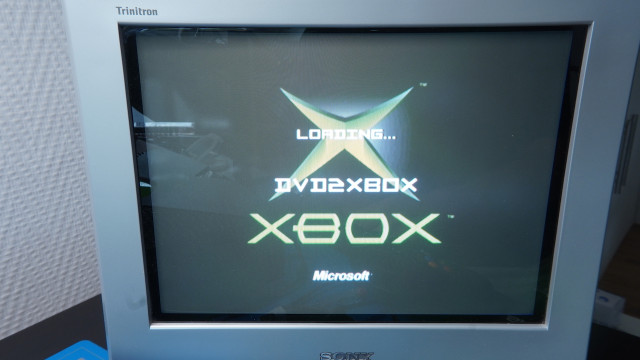
After it's installed, you can launch it from the Applications menu located on the Dashboard.
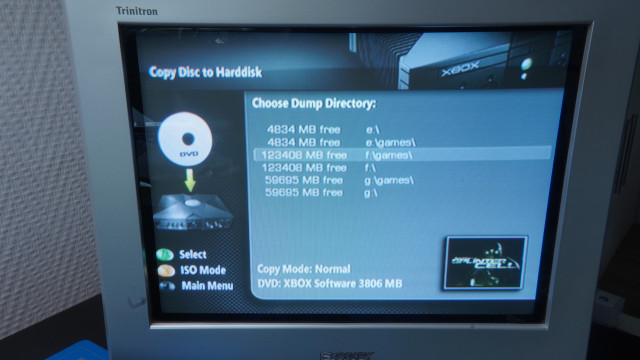
Insert your Splinter Cell DVD game and select Copy DVD/CD to Harddisk.
Then select your F or G drive and press the A button.
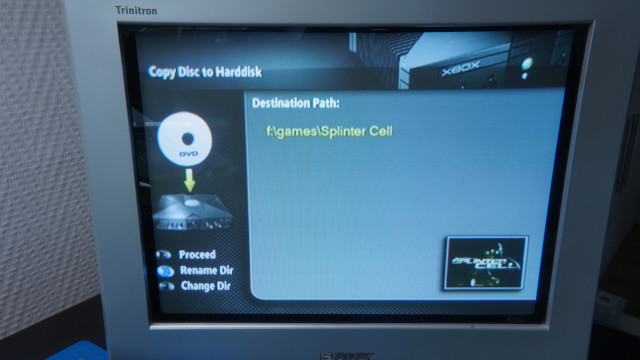
The destination path will be shown and you can press Start to proceed.
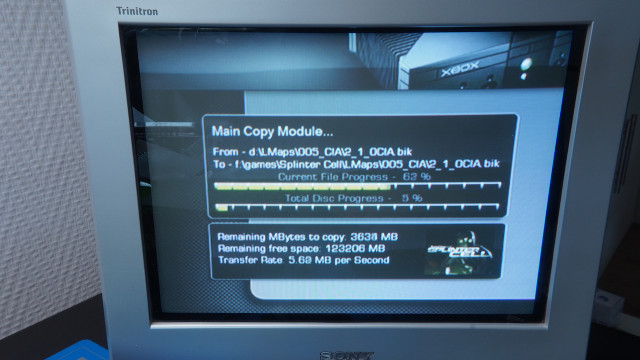
The copy process should commence and you can monitor the process which takes around 10 minutes.
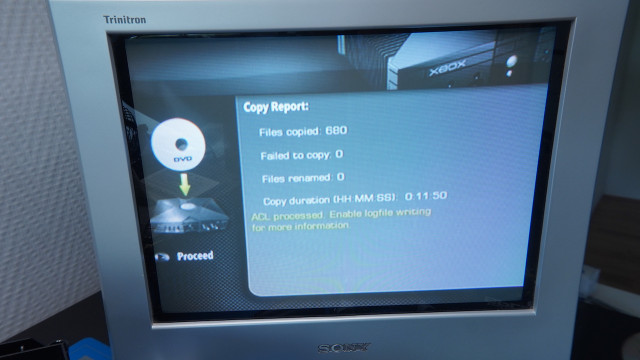
After it's done, a copy report will be shown. You should not have any failed to copy files.
The copied game will appear inside the Games menu on the Dashboard and you can launch it from there.
Thank you for reading this post and have fun with your softmodded Xbox.