Helping scientific research by mining Gridcoins can be satisfactory. You contribute to various projects by donating your CPU power. In return you get Gridcoins. This mining process uses energy and we want to do this in an economical manner.
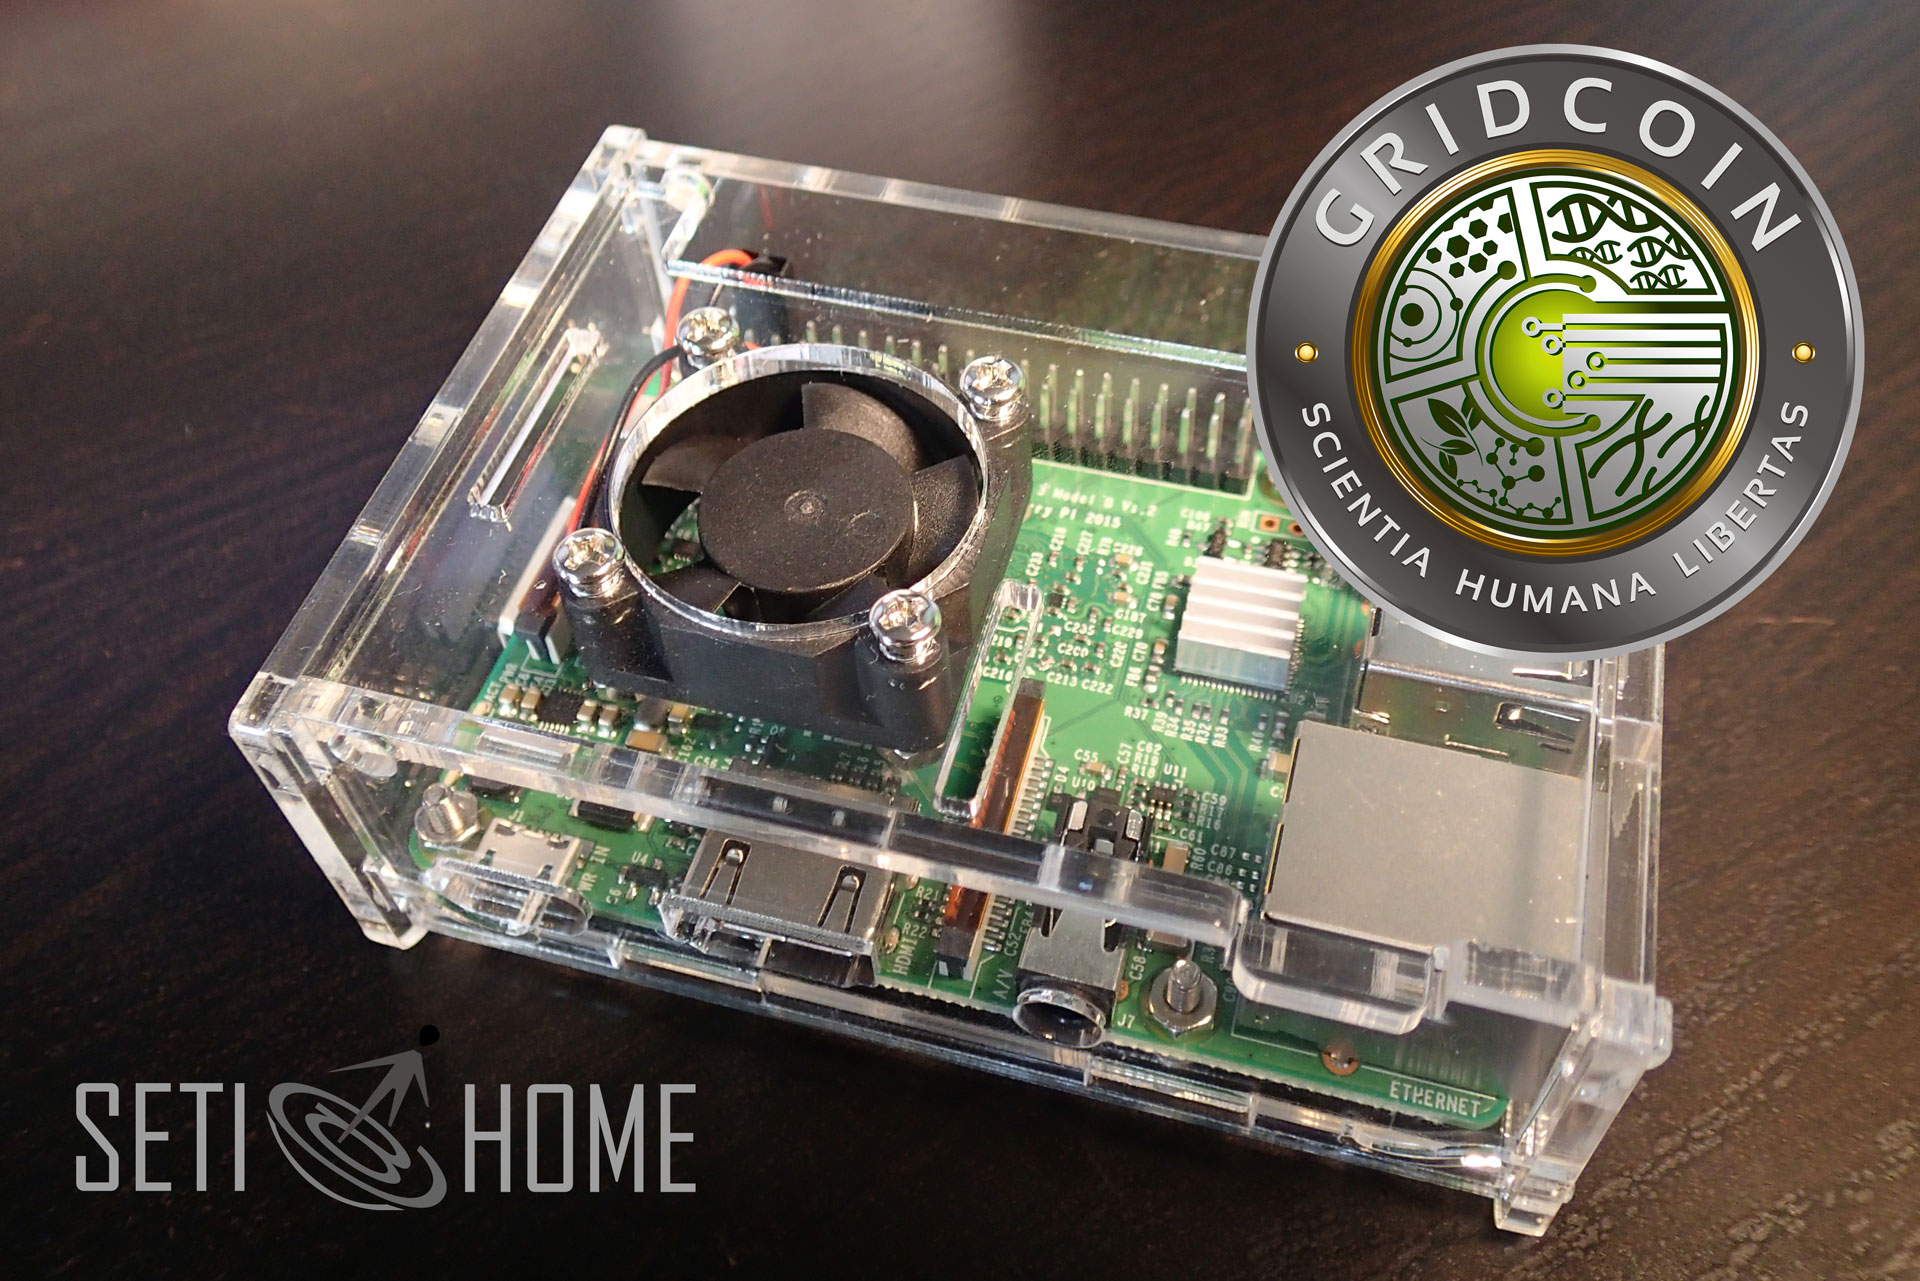
For this purpose we will build a Raspberry Pi 3 system which includes a fan to cool down the ARM Cortex-A7 CPU chip. I have bought a complete kit with power adapter, enclosure and fan.
If you already have a Raspberry Pi with Raspbian OS up and running, then you can skip the build instructions and go directly to the BOINC client setup process.

First we make sure that the heat sinks are placed on the processor (Broadcom BCM2837) and the controller (SMSC LAN9514) chips.

The Elpida B8132B4PB 1GB memory chip will also get this nice copper cooling plate.

The package included a Raspberry Pi 3 case, which was protected by a thin film.

This needed to be peeled off.

After some patience the perplex cleared up.

To build the housing we need to add these 3 mm bolts and plastic washers to hold the Raspberry Pi in place.

Insert the bolt from the bottom of the plate and add the washer.

Now you can place the board on top of it.

And tighten it with the provided nuts.

Then continue to assemble the case. First add the sides and the front plate. Don't finish it yet, but leave it open just like in the picture. We still need to be able to place the top cover.

The top cover has a place for a fan. The bolts are also included in the package.

To power up the fan we need to locate the power pins. Verify in the picture that the red wire connects to +5V pin and the black wire connects to the GND.

Now we can finish up the case by inserting the top cover inside the holes. The back of the housing should click without a problem.

To power the Raspberry Pi we need a 5V power adapter that provides at least 2.5A of current.

After plugging in the micro USB connector the fan started to spin.

The power consumption of the Raspberry Pi is around 4W. This 0.096 kWh on a daily basis. In a year it will get to 35kWh. A kilowatt hour costs me around 20 euro cent. So the cost of running it the whole year is 7 euros. Current price of Gridcoin is 4 cent. I am not sure if the Gridcoin payout will make money. But it was not my main goal of building this project.

Now it's time to install the Raspbian OS. Download the Stretch Lite version as we will not need any graphical interface.
To enable ssh login by default, open the image and create an empty file called ssh. On OSX you can double click on the image and drag this file inside it.
OSX has this nice app called ApplePi Baker. I have also used this for burn the RetroPie os.

After you are finished, insert the SD card into the Pi and turn it on. Initially you will need to login with a ethernet cable attached.
The SSH daemon should be running and you can login with the command:
ssh pi@192.168.0.38
default password is: raspberry
You can change your password with:
passwd
If you wish to get WiFi to work you can edit this file:
sudo nano /etc/wpa_supplicant/wpa_supplicant.conf
And add this code on to it. Change the credentials of your wifi connection.
network={
        ssid="YOUR_SSID"
        psk="YOUR_PASSWORD"
}
Then reboot the system:
sudo reboot
Now it's time to setup software in order to mine Gridcoins. In order to understand and setup the system please read more about this on the Gridcoin website.
Make sure your aptitude repository is up to date:
sudo apt-get update
Install the BOINC client. This is a command line client which is equivalent to the BOINC Manager for desktop systems.
sudo apt-get install boinc-client
Now edit the configuration file how the client will behave. In my case I have set it up to use max. 75% of the CPU, just to be on the save side and not to fry it.
sudo nano /var/lib/boinc-client/global_prefs_override.xml
Replace the contents of this file to:
<global_preferences>
   <run_on_batteries>0</run_on_batteries>
   <run_if_user_active>1</run_if_user_active>
   <run_gpu_if_user_active>0</run_gpu_if_user_active>
   <suspend_cpu_usage>50.000000</suspend_cpu_usage>
   <start_hour>0.000000</start_hour>
   <end_hour>0.000000</end_hour>
   <net_start_hour>0.000000</net_start_hour>
   <net_end_hour>0.000000</net_end_hour>
   <leave_apps_in_memory>0</leave_apps_in_memory>
   <confirm_before_connecting>1</confirm_before_connecting>
   <hangup_if_dialed>0</hangup_if_dialed>
   <dont_verify_images>0</dont_verify_images>
   <work_buf_min_days>0.100000</work_buf_min_days>
   <work_buf_additional_days>0.500000</work_buf_additional_days>
   <max_ncpus_pct>100.000000</max_ncpus_pct>
   <cpu_scheduling_period_minutes>75.000000</cpu_scheduling_period_minutes>
   <disk_interval>60.000000</disk_interval>
   <disk_max_used_gb>10.000000</disk_max_used_gb>
   <disk_max_used_pct>90.000000</disk_max_used_pct>
   <disk_min_free_gb>1.500000</disk_min_free_gb>
   <vm_max_used_pct>75.000000</vm_max_used_pct>
   <ram_max_used_busy_pct>50.000000</ram_max_used_busy_pct>
   <ram_max_used_idle_pct>90.000000</ram_max_used_idle_pct>
   <max_bytes_sec_up>0.000000</max_bytes_sec_up>
   <max_bytes_sec_down>0.000000</max_bytes_sec_down>
  <cpu_usage_limit>75.000000</cpu_usage_limit>
   <daily_xfer_limit_mb>0.000000</daily_xfer_limit_mb>
   <daily_xfer_period_days>0</daily_xfer_period_days>
</global_preferences>
Restart the boinc-client
sudo service boinc-client restart
Install boinctui. It's a ANSI graphical interface for the BOINC client that gives you the same options as BOINC manager on a desktop computer.
sudo apt-get install boinctui
Setup for SETI@home
I am assuming you have a valid SETI@home project account and have a basic understanding how the Gridcoin system works.
Run this command to get your authentication key:
boinccmd --lookup_account http://setiathome.berkeley.edu boinc@accout.com yourpass
Use this key to attach to your account:
boinccmd --project_attach http://setiathome.berkeley.edu {authenticator key}
Check if you were succesfull and you see tasks stating up
boinccmd --get_simple_gui_info
An easier way to do this is by using boingtui.
The first time you start it you will get a prompt for host, port and password. Just accept the default values and press Enter.

You should now be able to see all the project tasks.

If you get nervous about the temperature of the Raspberry Pi CPU you can use this command to check it. Mine is around 43 'C.
/opt/vc/bin/vcgencmd measure_temp
If you have any questions don't hesitate to contact me.