It can happen that molten filament can leak from the hotend. This usually happens when there is a gap between the heat break hotend throat and the nozzle. This is the result of poor assembly of the extruder's hotend part.
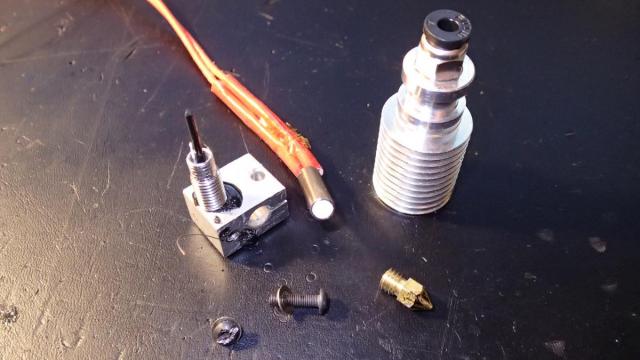
After the hotend cools down most of the parts get stuck together and disassembly becomes challenging. Below you can see an image of all the parts that could be saved for the rebuild. The heating block together with the hotend throat and the thermistor are impossible to take apart. In my case I did not risk to reheat it as I thought it would be dangerous to take things apart at 200 °C and because the parts are not very expensive I decided to discard these parts. The ceramic cartridge heater and the heatsink could be salvaged. The nozzle was also kind of intact, although flooded with filament and since I had a lot of them in storage I got rid of it as well.
All the parts needed to assemble a new version of the extruder's hotend are as follow:
- V6 J-head heating block
- Nozzle (I am using 0.3 mm diameter)
- Stainless Steel V6 Heat Break Hotend Throat M6 x 26mm for 1.75 mm filament
- Heatsink Metal Heat Cooling Tube
- E3D V6 J-head Pneumatic Connector
- Ceramic cartridge heater
- 100K NTC 3950 Thermistor (with wire)

First attach the nozzle to the heating block.

Then screw in the hotend throat inside the heating block. Do not make it tight just yet!

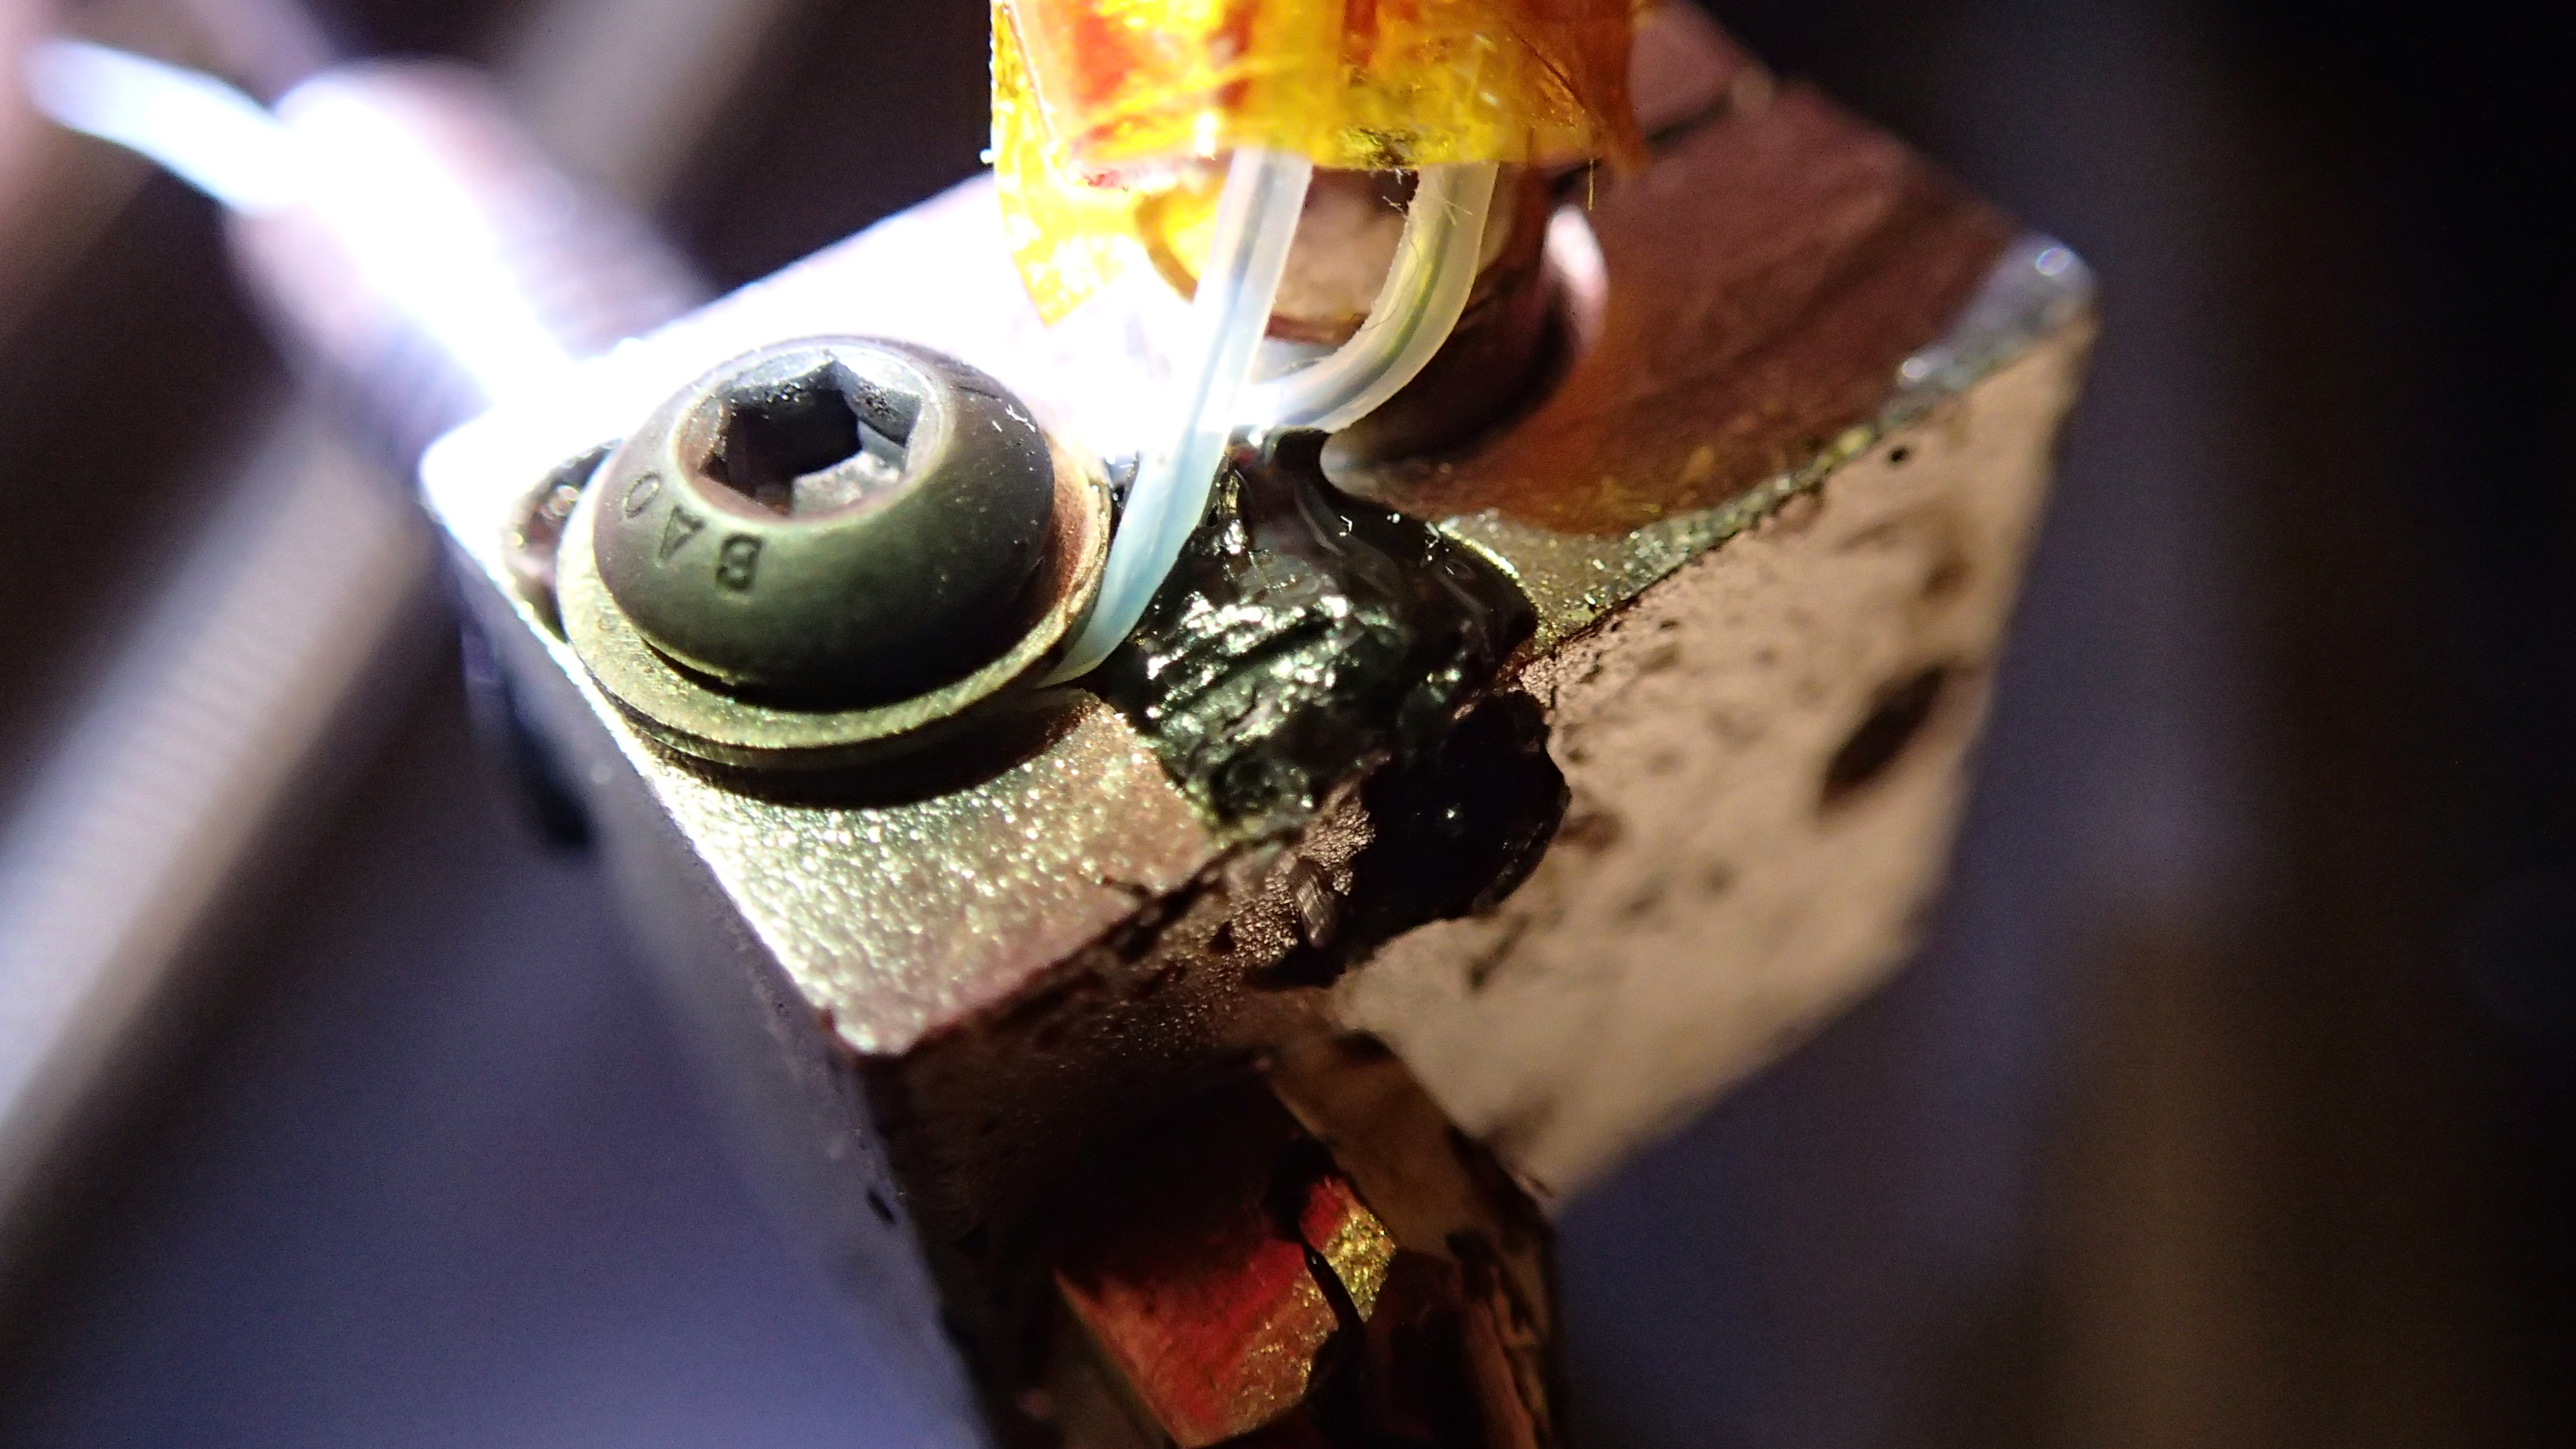
Now make sure that the nozzle is not fully touching the aluminum heating block. There must be small gap just like in the picture below:

Tighten it up really well. I was using an adjustable wrench and a socket wrench. This part is crucial as when this is done incorrectly the hotend will leak filament!

Attach the J-head pneumatic connector to the heatsink.

In the end you will attach it to the hotend throat and the PTFE tube shall lead the filament straight to the heating block and nozzle. The heatsink makes sure that the filament does not melt before entering the hotend.

Next you will need to slide in the ceramic cartridge heater and the thermistor inside the heating block.

Put the end of the thermistor inside the small hole and tigh it up with the allen key. Do the same for the ceramic heater element. I also taped the cables of the heat element and the thermistor with kapton tape. The end result looked like this:

To finish up the Bowden extruder's hotend you'll need a 40mm fan and print the parts Bowden_carriage.stl and Bowden_carriage_clamp_FanMount.stl from this design: E3D v6 Bowden X-carriage mount Prusa i3. Also print the exhaust for the fan named i3R_Compact_E3Dv6_40mm_Fan_Duct_01.STL from this design: E3D v6 Compact Extruder for i3 Rework. You can also print this fan cover cover: Prusa i3 40mm Fan Cover To connect the fan exhaust to the fanmount I have created the Bowden X-carriage mount to fan duct connector. After you assemble all the parts you should end up with something like this:
