This vintage Canon parallel scanner needed some restoration and for that purpose it needed to be taken apart. It is a bit tricky as some of the parts are glued with adhesive tape and need to be detached very carefully. This small tutorial shows a step by step disassembly instructions of the scanner.
The key for dismounting of the scanner is at the top, just next to the scanner cover.

There are two plastic stripes that are attached to the glass with a double sided adhesive tape. I managed to pull it slowly apart using a knife.

On the back of the scanner there is a sticker that covers the mount of the cable.

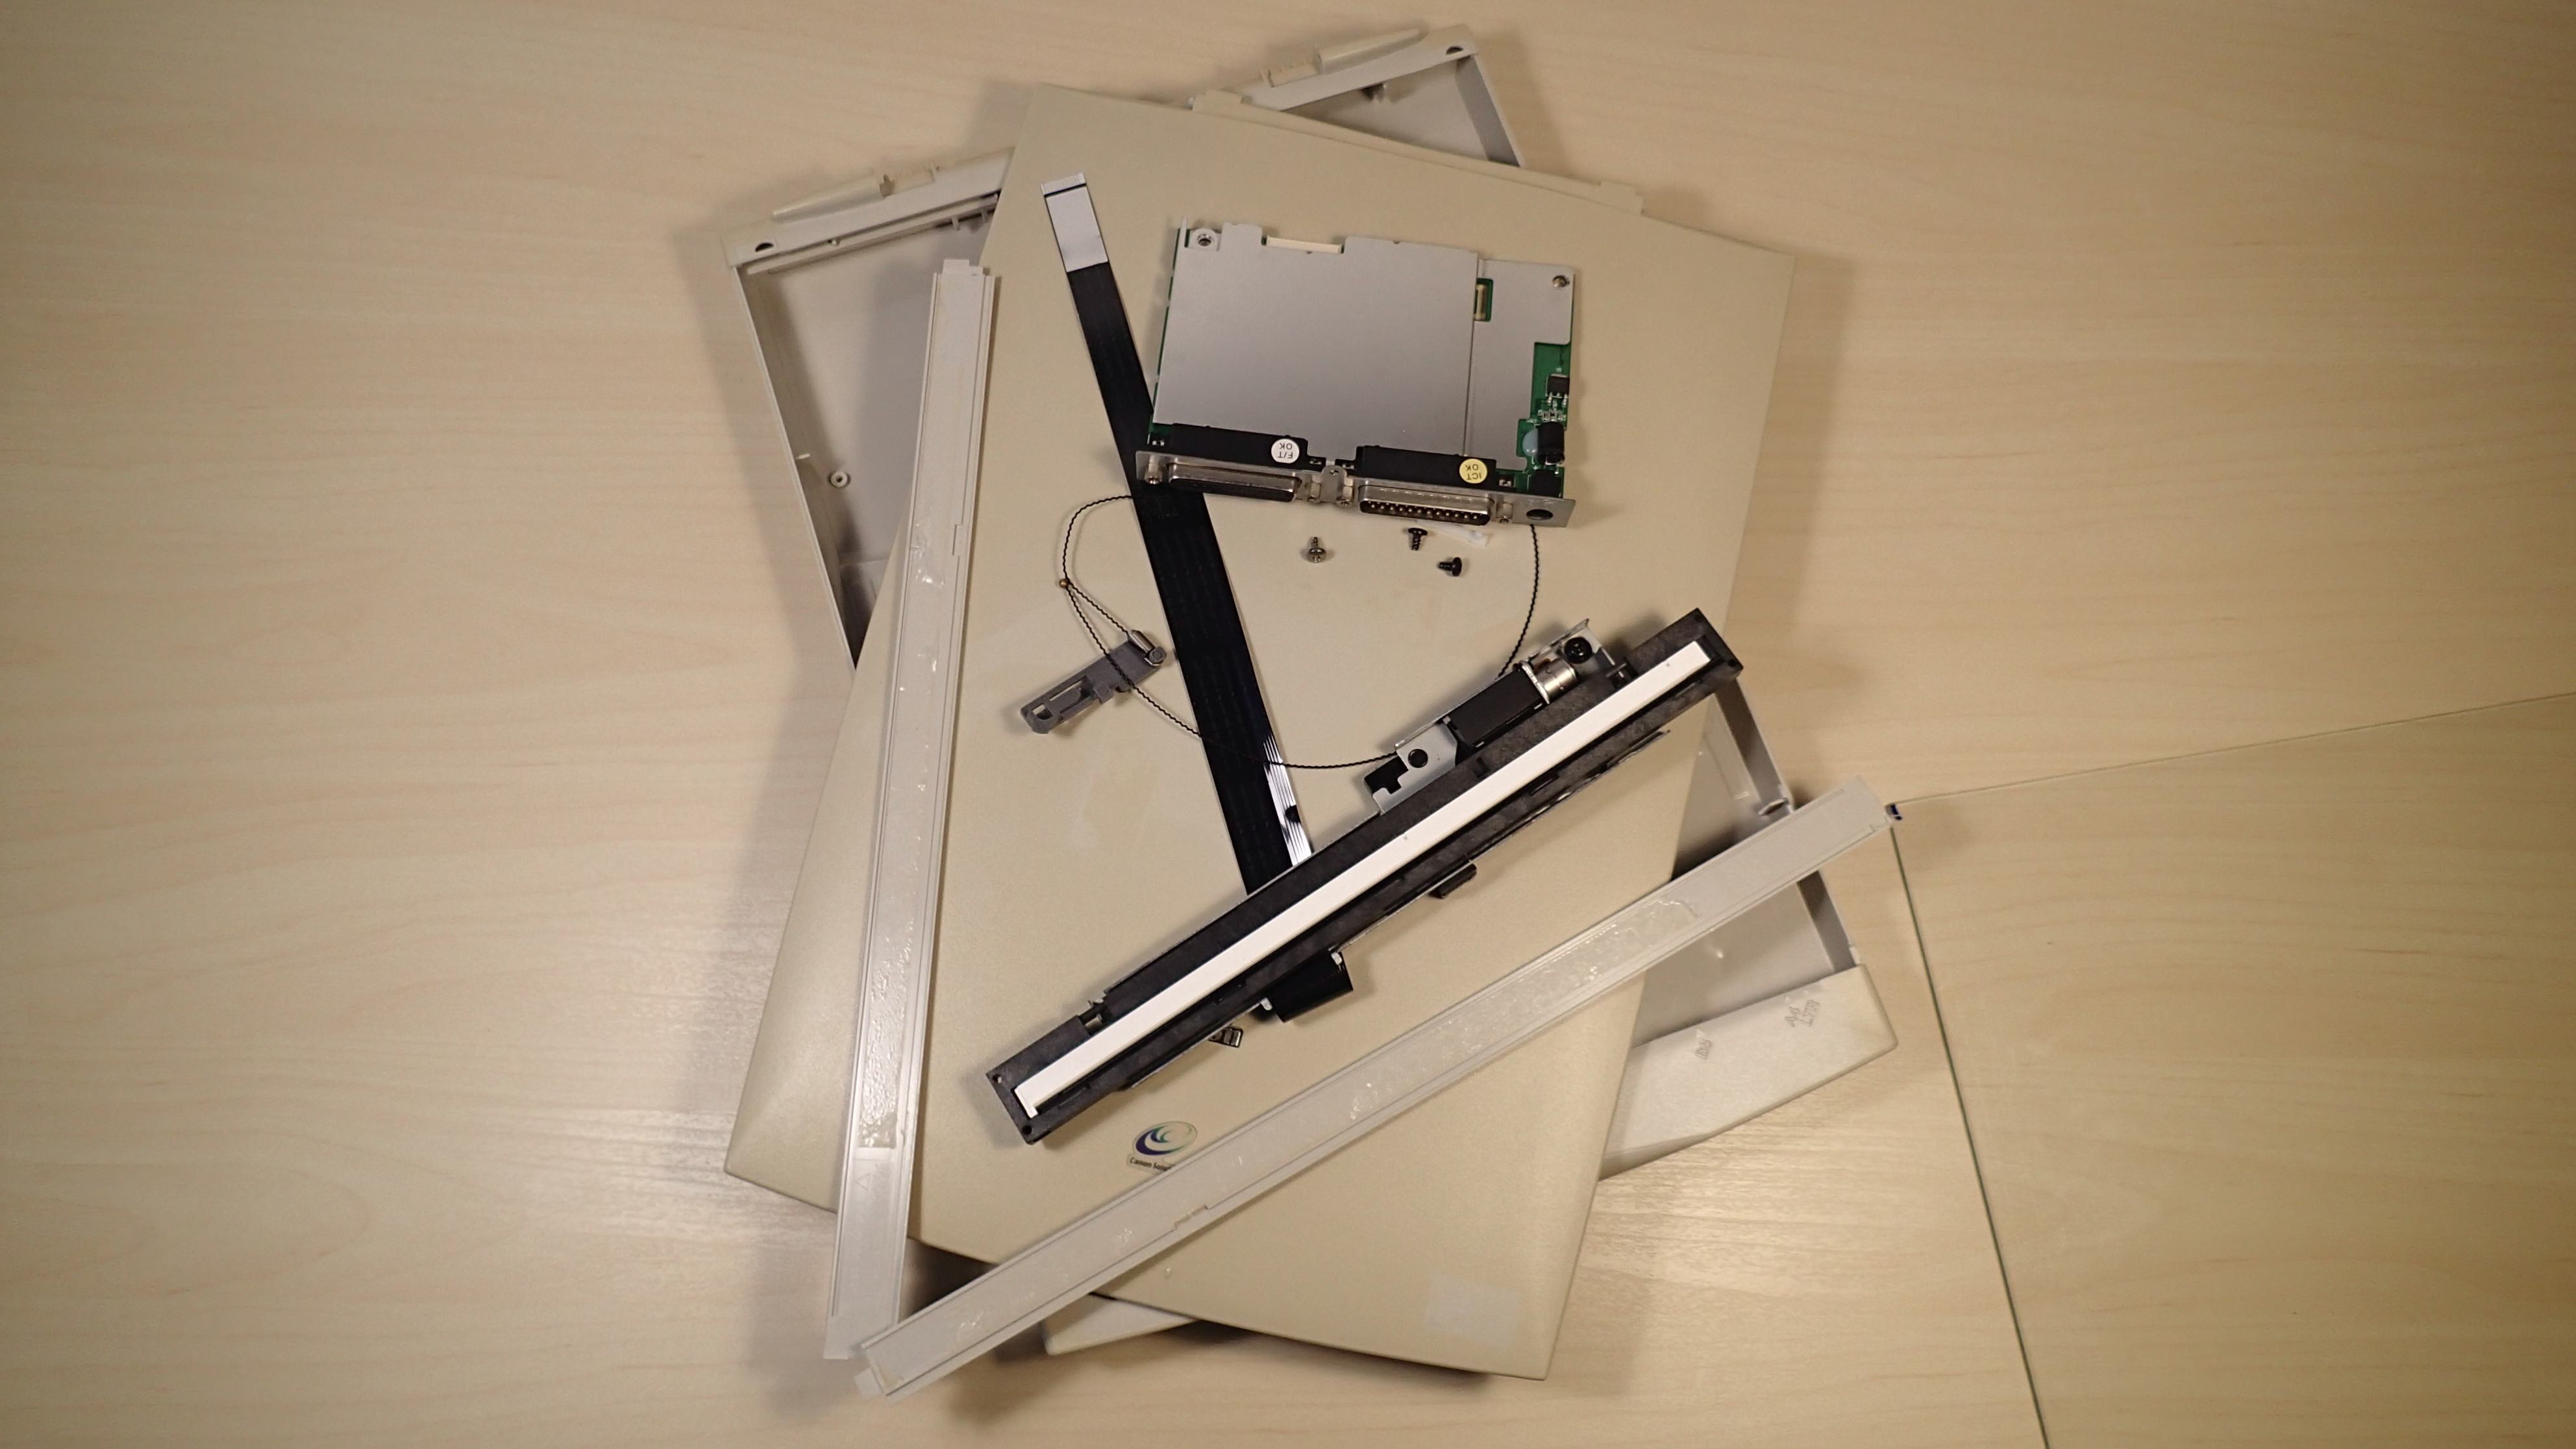
This is the view from the inside of the scanner.

After the cable is loose, the bar with the scanner sensor can be separated.

The cable that slides the scanner sensor is attached to the gears on the bottom of that bar it his way.

There is a plastic part that holds the cable in place.

It is a click system that can be accessed on the bottom of the scanner.

Now, remove the screw on the back of the scanner.

There are two other screws holding the parallel controller board in place.

Remove the connection that are attached to the parallel controller card.

Now the whole board can slide out.

One of the flat cables is glued with adhesive tape to the metal shielding parts. Carefully pull it loose.

To remove the scanner cover push the bottom of the plate so it will bend a little and you can easily detach it.

Look at the side of the cover where it is attached.
