SIDKick is yet another SID replacement chip for your C64. It is completely free and open source based that you can build yourself.
While creating my SID synthesizer project I have fried the original SID chip and the retro community on Twitter has pointed out to me that these chips are very fragile and it is better to continue experiments using a SID replacement.
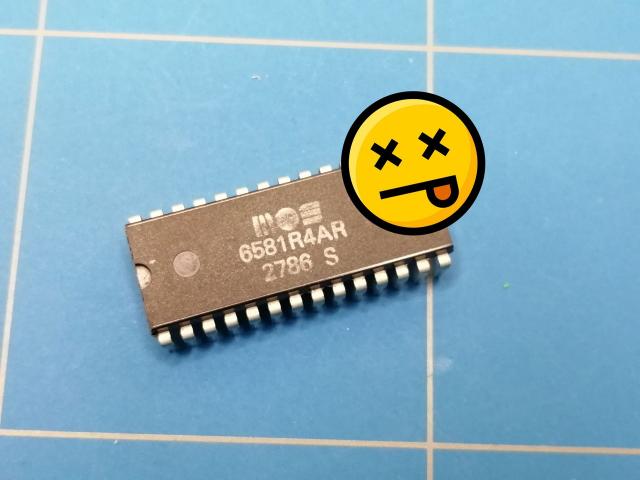
I have already ordered an ARMSID, but @Devzine_pl pointed out that it was better to use a SwinSID to experiment with as they are much cheaper. He was kind enough to send me one that was of his creation. It was very easy to get it up and running and it worked right away.
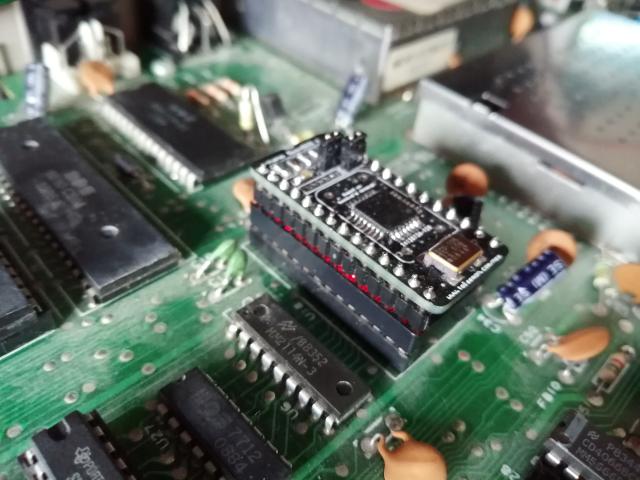
Another suggestion came from Lee and it was the SIDKick project. He also kindly offered to send me the one that he has made. When it arrived I just had to solder the pin headers and install the software on Teensy 4.1 board. Lee also helped me troubleshoot and get this board up and running as this ended up to be a bit of a challenge. In this blog post I will describe the process of getting the SIDKick up and running.
I have followed the steps described inside the readme that is on the SIDKick github page. It is well written, but it is easy to miss something out as some steps have just a textual description. I will add some pictures in this blog post to make it more clear and hopefully easy to understand. I will also add some information that is not inside the readme.
Start by soldering the (male) header pins on the SIDKick board. It is also best to use the thinner rounded pin headers as they should have a better fit inside a socket.
Best way to do this is by inserting the pins inside a breadboard and then soldering it.
The next step is to insert the female headers on top of the board that will host the Teensy 4.1 board.
To solder them I have used a thinner 0.5 mm solder wire as it gets pretty narrow next to the other already soldered header pins.
If you will want to send audio using external DAC or MQS outputs and/or add connections for a second SID and FM-sound then add an angled 2-pins header for the MQS, 3-pins header (maybe even better angled one) for DAC and a 6-pins headers for the address lines.
To hold them in place while soldering, I have used sticky tacks.
We will also need a 2-pins header and a jumper to be able to power the SID while inside the C64 SID socket. Note that this connection needs to be removed while you are programming the Tennsy using USB and the SIDKick is already being powered using the SID socket.
Solder it on the bottom side of the board. Instead you can also short the solder jumper that is located next to the normal jumper.
Next I have inserted the male header pins inside the female pin headers on the SIDKick to help while soldering. They were also rounded to match the other board.
Then solder the pins to the Teensy 4.1 board.
After soldering you can remove the Teensy 4.1 board so it can be programmed.
To write the SIDKick firmware you will need Arduino IDE and Teensyduino add-on. Do not download the latest version of the software as it will not work!
When I tried flashing the software for the first time using the latest Arduino IDE 1.8.15 with Teensyduino 1.54 it was giving me an "out of memory error" while using the "Fastest" build option. Compiling and uploading using the "Faster" option worked, but when trying it inside the C64 the setup screen looked faulty and there was no sound.
Noel from Noel's Retro Lab gave me a golden tip to try previous version of the Arduino IDE. So I have downloaded Arduino IDE 1.8.12 and Teensyduino 1.52. To fetch previous versions of Teensyduino copy the download link for your OS, paste it into the address bar and change the td_xxx to td_152. For windows the download link should be:
https://www.pjrc.com/teensy/td_152/TeensyduinoInstall.exe
For OSX:
https://www.pjrc.com/teensy/td_152/TeensyduinoInstall.dmg
You will also need to download the ZIPped source code from the SIDKick github page.
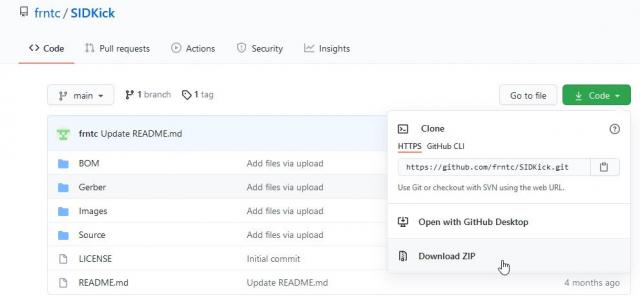
After unpacking the zip file, you will need to look inside the Source/ folder.
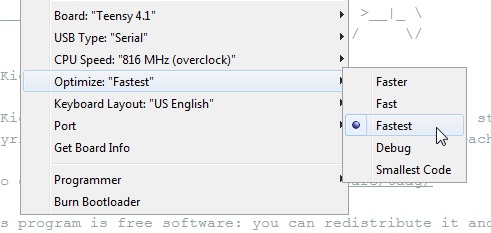
Open Arduino IDE and make sure you have selected Teensy 4.1 and these settings: (CPU speed = 816 MHz, Optimize: "Fastest"). Using a slower speed is also possible, but you need be change TEENSY_CLOCK define inside the SIDKick.ino sketch.
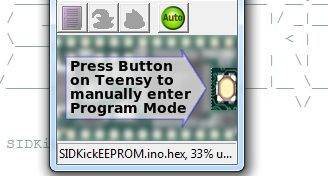
First open the SIDKickEEPROM.ino sketch and upload it. This will erase the EEPROM. You might be prompted by the Teensyduino add-on to press the reset button on Teensy. Just do as requested and the hex file should be uploaded.
You will need to overwrite some files inside the Teensy Audio Library folder as the author made a patch. On Windows the location of the files is:
C:\Program Files (x86)\Arduino\hardware\teensy\avr\libraries\Audio
On the Mac it is located inside this folder:
/Applications/Arduino.app/Contents/Java/hardware/teensy/avr/libraries/Audio
Copy these 4 files: output_mqs.cpp, output_mqs.h, output_pt8211.cpp, and output_pt8211.h files from the Modified Teensy Libraries/ folder over the existing files inside the Teeny Audio library folder mentioned above.
If you don't do this step you will get the following compile error: SIDKick:315: error: 'class AudioOutputPT8211' has no member named 'poll_update' audioPT8211->poll_update();
Also open incl_resid.h tab inside the Arduino IDE and change the default location c:\SIDKick\ of the SIDKICK_SOURCR_DIR. The correct path it is the location of your downloaded SIDKick Arduino folder.
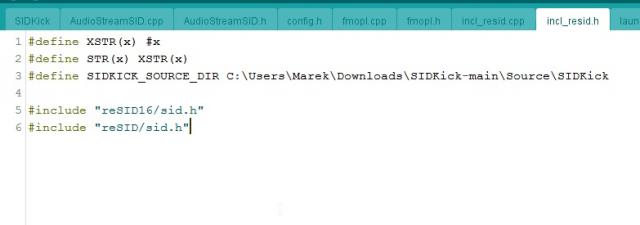
If you fail to change this you will get this compile error: incl_resid.cpp:3:53: fatal error: c:\SIDKick/reSID16/envelope.cc: No such file or directory
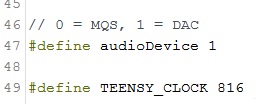
Now you can open SIDKick.ino sketch and if you wish to change the settings for the MSQ / DAC output or the TEENSY_CLOCK. Yyou can do that on lines 47 and 49. The defaults worked fine for me.
You should now be able to compile and upload the sketch without any errors. When you see this message, you were successful! You might need to press the reset button on the Teensy board so it will start to program the board.

Let's proceed to the last part, which is installing the SIDKick inside Commodore 64.
Make sure you have inserted the Teensy correctly into the SIDKick board. Check the Teensy pin 1 marking on the bottom of the SIDKick board in matching the Teensy pin 1.
As the SID socket of my C64 was very narrow, I had to insert an empty socket on top of the SID header pins.
Insert the SIDKick inside the SID socket of your C64. Check the markings on the bottom of the PCB where it says SID pin 1. I have also inserted 3 jumper wires to the DAC output jumpers for external sound output.
You can also route the DAC (or MQS) audio output back to the C64 motherboard so it will sound through the speaker of your monitor.
In order to do that you will need to short the solder jumper labeled DAC to the solder pad in the middle. Like in the pictures below. For MQS output you will need to solder the other pad (labeled MQS) to the center pad.
Now you can write the BASIC command: SYS 54301 to enter the setup screen of SIDKick.
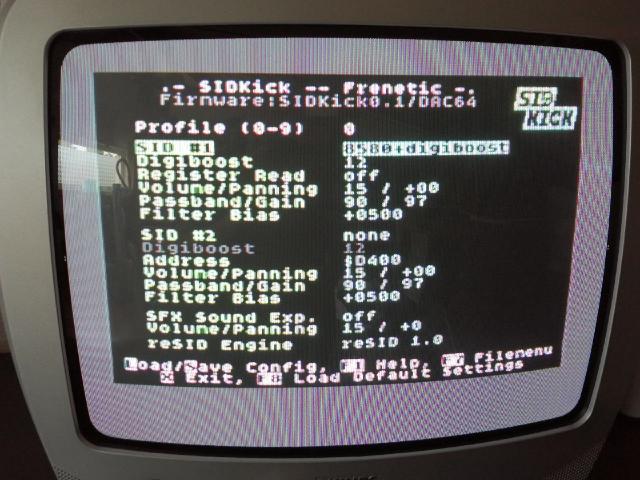
Make sure the SID #1 output is selected to the SID that is compatible with your Commodore system. Then you can press S-key to save your settings and X to exit.
At this point you should have a fully operational SID replacement.
A nice feature of SIDKick is that you can add PRG files into the SIDKick filemenu and launch them.
Inside the downloaded files from SIDKick Github there is a folder called: PRG Launcher/. It contains the tool needed to patch your compiled Teensy HEX file and add your own PRG files to it. There is a Windows and Linux folder. I have used the Windows version.
First you will need to download SRecord tools. The SRecord package is a collection of powerful tools for manipulating EPROM load files. Inside the zip there is a file called: srec_cat.exe. Copy this file into the PRG Launcher/Windows/ folder.
Next you will need to get some PRG files for C64. For example from the PlanetEMU website.
Create a folder called PRG inside the PRG Launcher/Windows/ folder and copy there all of your downloaded PRG files. I have also changed all of the filenames so they don't contain spaces or other characters. It should look something like this:

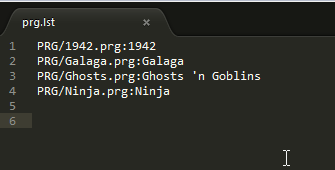
Now edit the prg.lst file so it will point to these files. After the semicolon you can specify the name of the program. Also add an empty line feed on the bottom of the file, otherwise the patch script will not be able to handle it correctly.
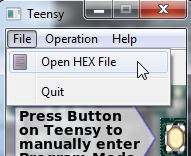
Locate the compiled HEX file from the SIDKick project. A way to find it is to click on the "Open Hex File" menu item inside the Teensy Loader application after the compile inside Arduino IDE is finished. The file browser should point to the correct location. In my case it was: C:\Users\Marek\AppData\Local\Temp\arduino_build_231354
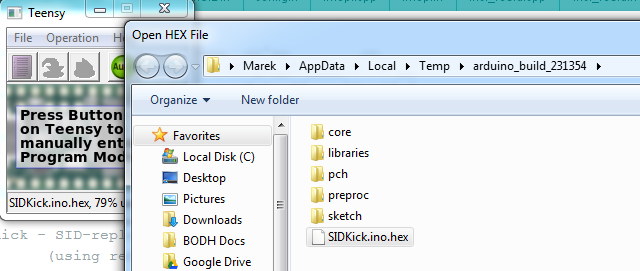
Copy this file to the PRG Launcher/Windows/ location and rename it to: SIDKick.ino.TEENSY41.hex
You are ready to run the script. Open cmd terminal window, change to the PRG Launcher/Windows/ directory and execute the patch.bat script. This should be the output:

The file SIDKick_Launcher.hex is now be patched with your PRG files.
Upload this file using the Teensy Loader back to your Teensy. You might need to press the reset button in order for the process to start.
After you reinsert the SIDKick into your C64, you can enter the setup screen with: SYS 54301 BASIC command. When you press F7 you should be able to see a list of all of you PRG files.
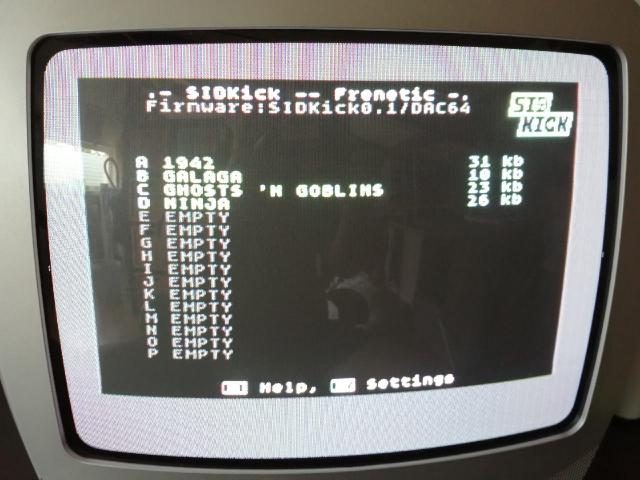
Press a letter corresponding to the prg file and enjoy!

This is the download link to my compiled (and patched) HEX files, so you can flash them with the Teensy Loader in case you will fail to compile them yourself.
