In this project we are going to create a simple BASIC program, then save it to the tape (which in our case will be a wave form on a PC) and in the end convert it to a TZX image file that can be run on a ZX Spectrum emulator like Fuse.
Let's start by typing this test program on the ZX Spectrum.
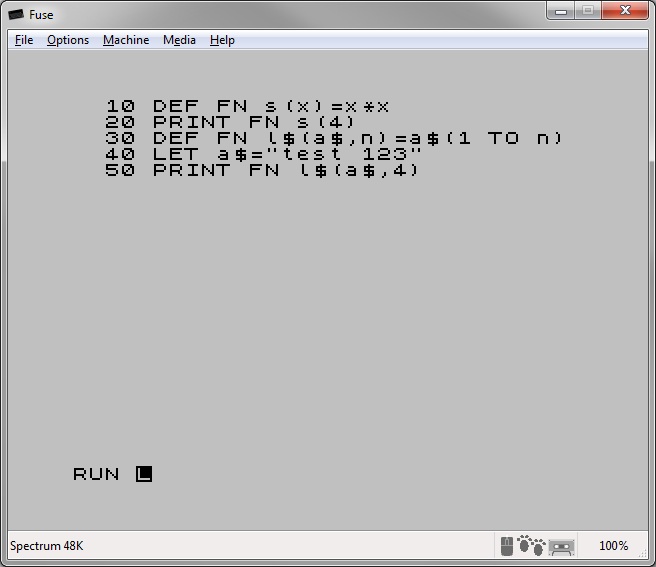
10 DEF FN s(x)=x*x
20 PRINT FN s(4)
30 DEF FN l$(a$,n)=a$(1 TO n)
40 LET a$="test 123"
50 PRINT FN l$(a$,4)
As you can see this program above is using some pretty nice BASIC functions. The keyword DEF FN and FN were predecessors of modern function definitions. The first one is defining a square root and the second is a left$ string operation function. But our goal is not to learn ZX Spectrum BASIC, but to save it and convert it to a emulator file. So let's focus on that. We are not going to use a tape, but instead a free audio editor and recorder application called Audacity. You can download it for free. It has compiled versions for Windows, Mac and Linux.
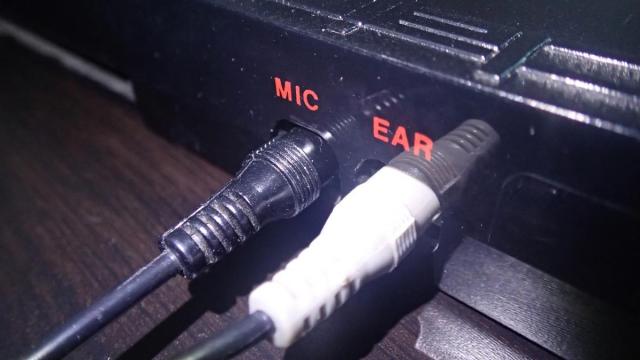
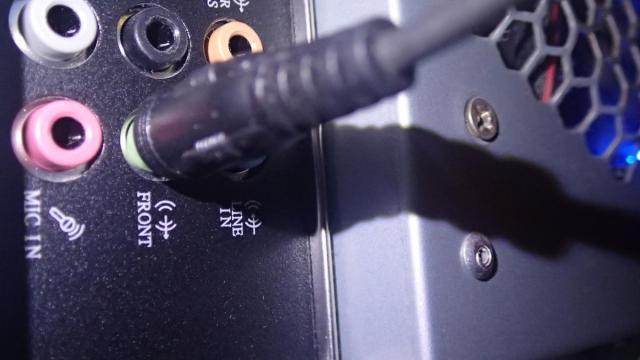
In my setup I have installed two audio cards in my Windows machine, which allows me to play binary tape recordings directly into the EAR plug of ZX Spectrum and simultaneously listen to an music sound track through my speakers. But it's not at all necessary. Below you see that the ZX Spectrum has 2 audio jack connectors. They are MIC and EAR. EAR is connected to the play function and EAR outputs audio for recording.
The ports are both mono, so we need to make sure it will receive the correct signal for the sound card, which is stereo. I have solved it by connecting stereo extension cables for the output of my audio cards to mono audio jacks.
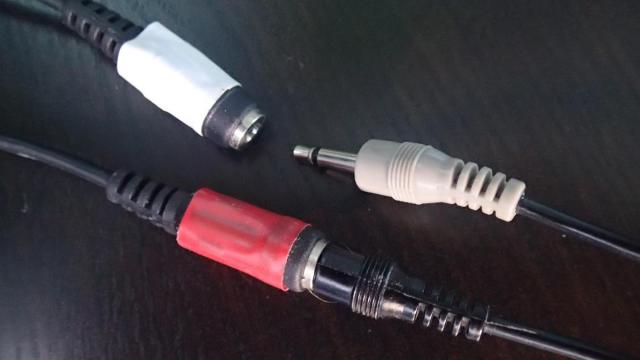
The wire that is marked with white electrical tape is connected to the ouput of the sound-card, which happens to be the internal sound card on the motherboard. This will emulate the PLAY button on the tape deck.
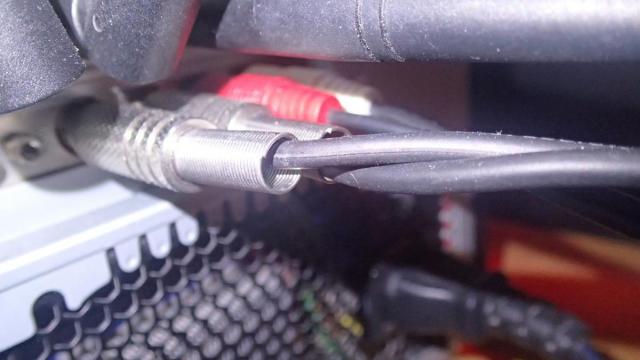
The cable with the red markings is connected to an external sound-card with an adapter to cinch connectors. The other reasons that I am using an external sound-card for recording is because it has less interference and is it's better for recording. The red and white connectors are for the recording. The other two silver connections are the main sound output of my computer and are wired to external audio speakers.
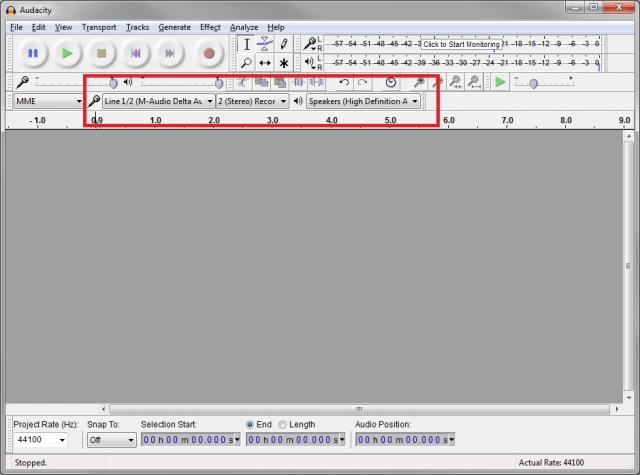
Now that we have explained the physical connections, let's look at the Audacity configuration. After you start up the application it will look like on the screenshot below. The marked area is where the input and outputs are configured. Because I am using this dual sound-card setup I needed to configure the correct cards for recording and playback. As you can see, I have configured recording for stereo. At a later stage I have noticed that you can also select mono, but I have not tested if the recording would work properly. I encourage you to try it. This would allow you to skip the steps that convert the tracks from stereo to mono, which are covered in the next steps.
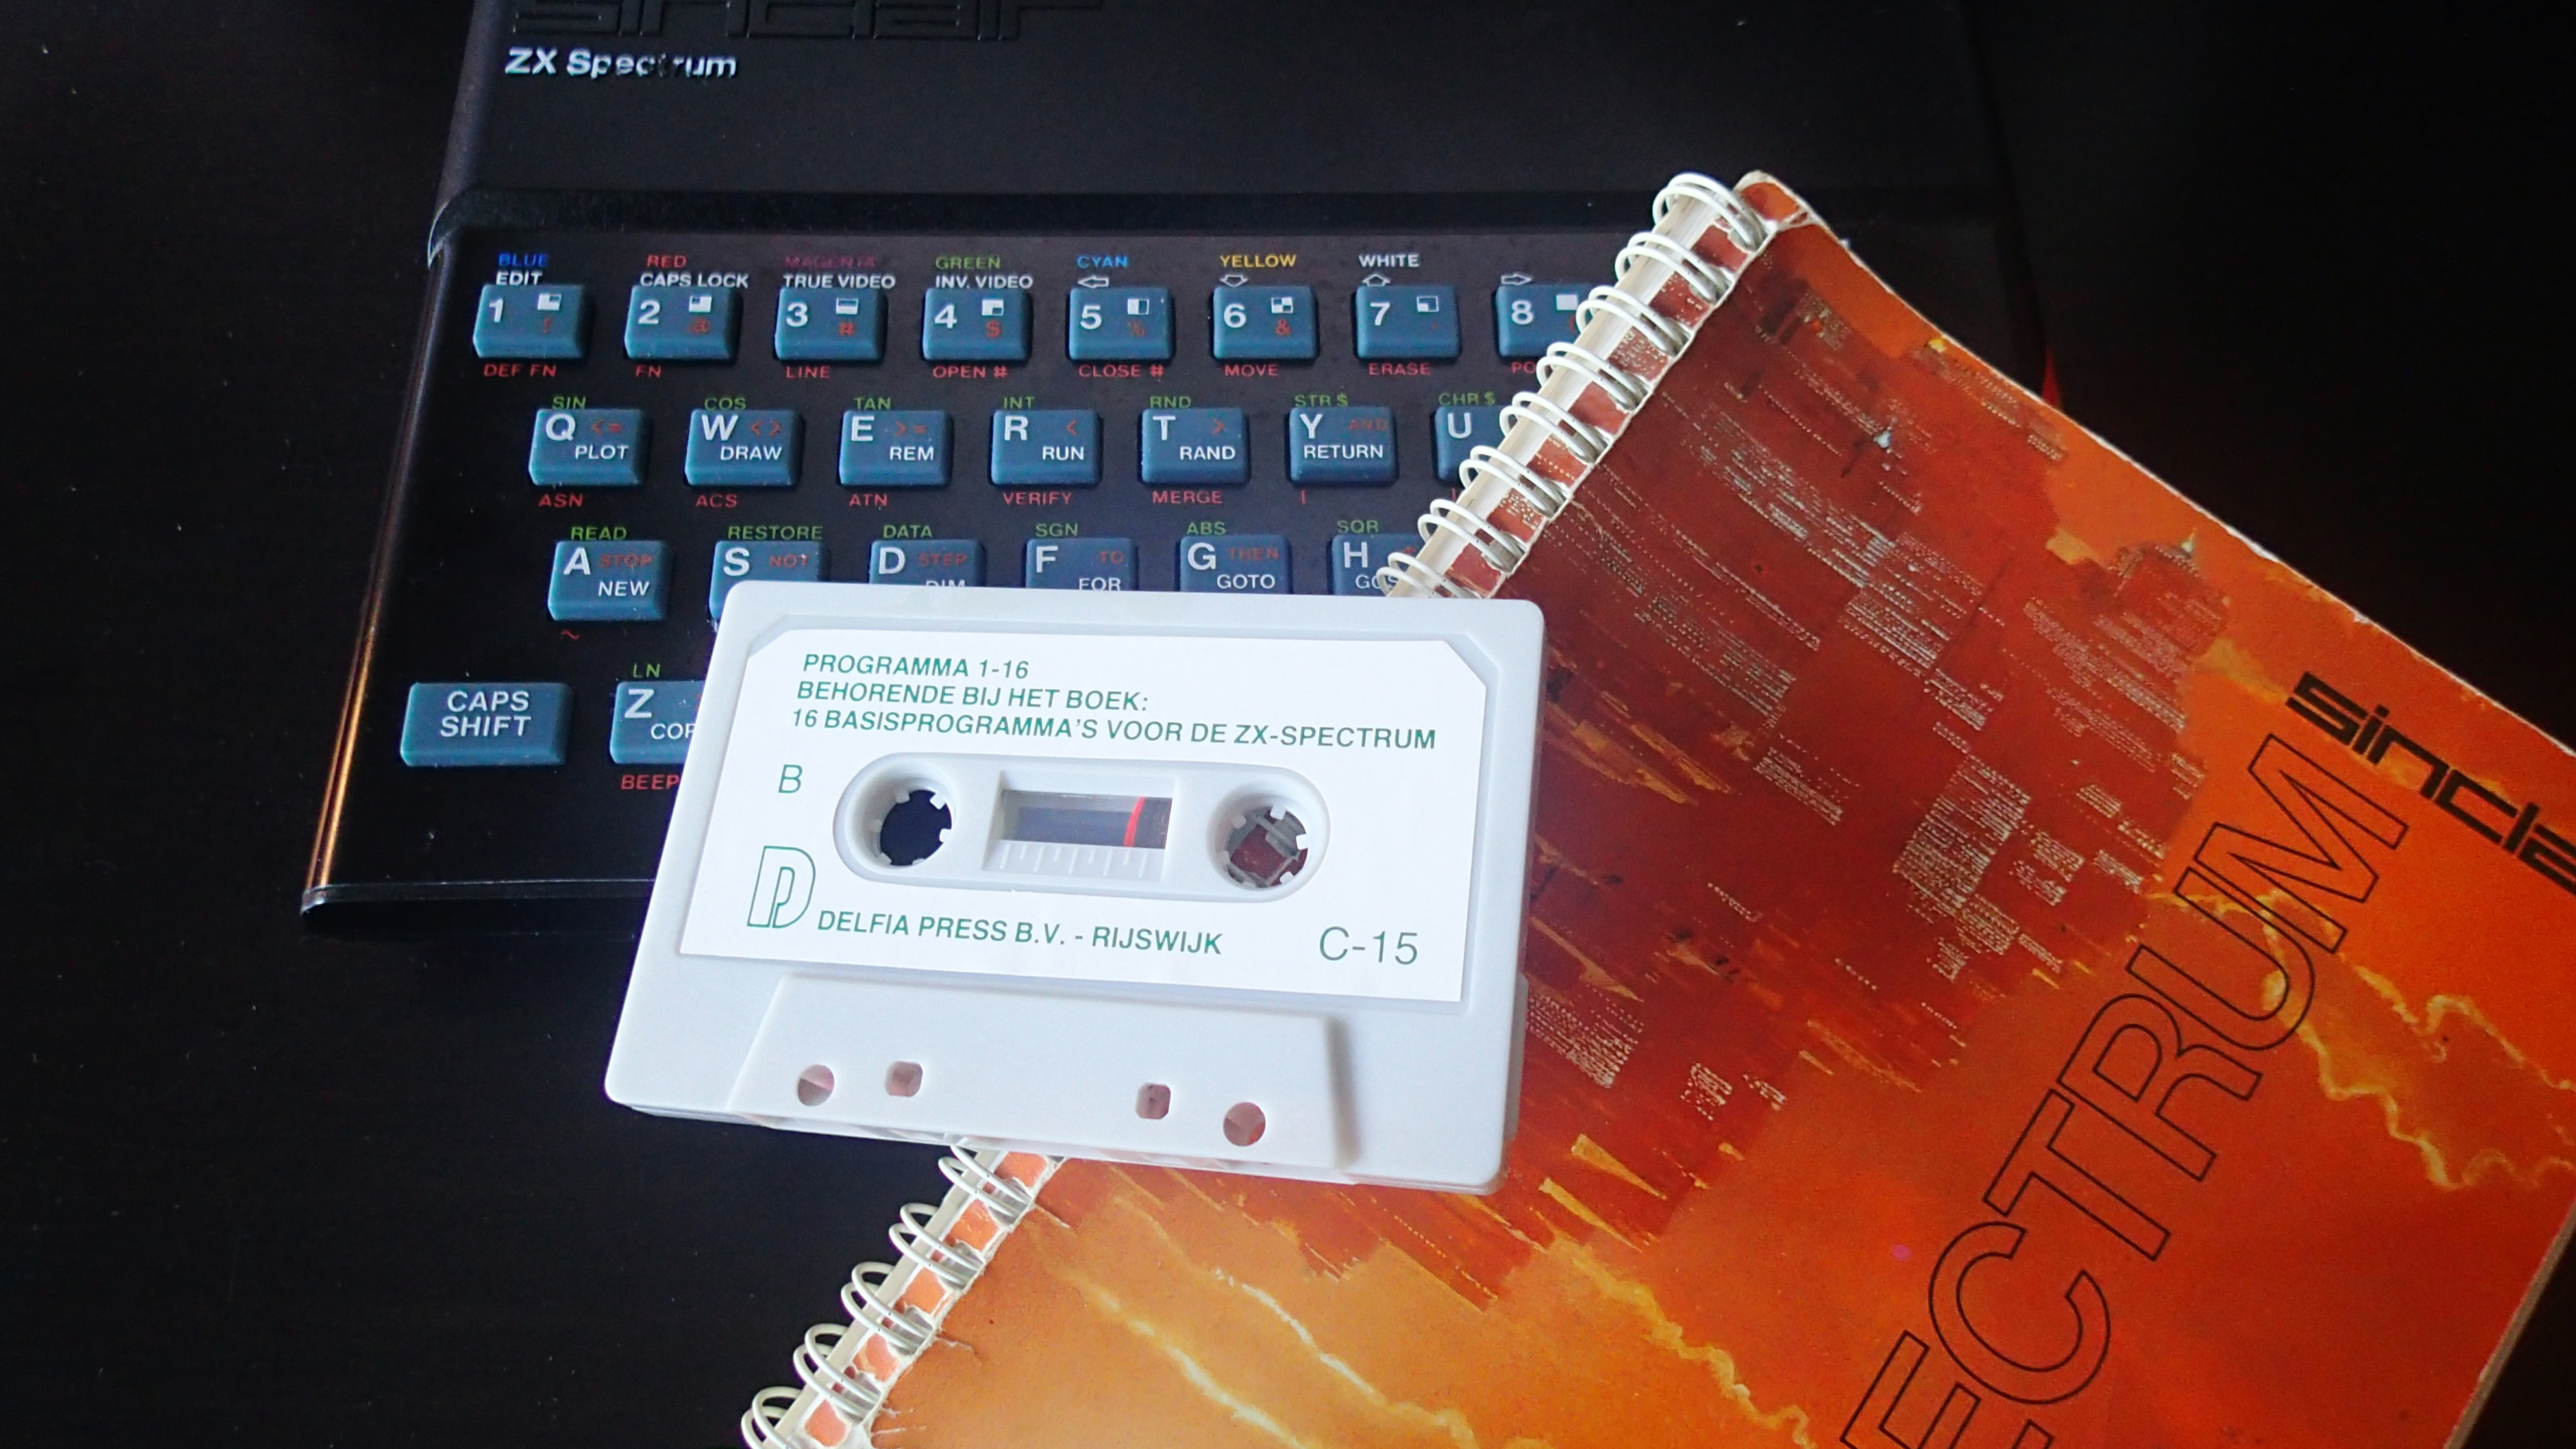
Now is the time to save our program from the ZX Spectrum. Type save "FN test" and press enter. You will be prompted to start tape and press any key.

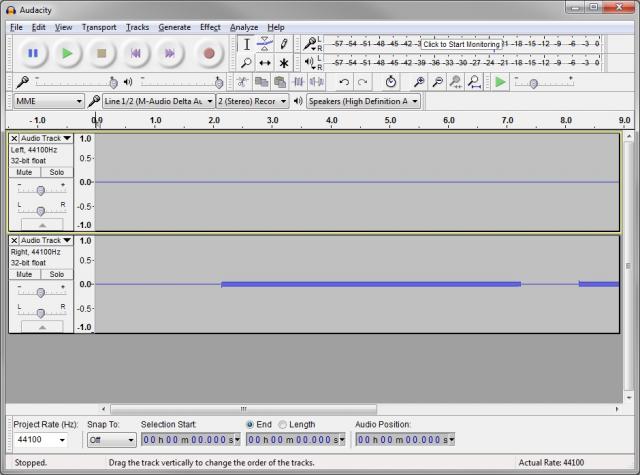
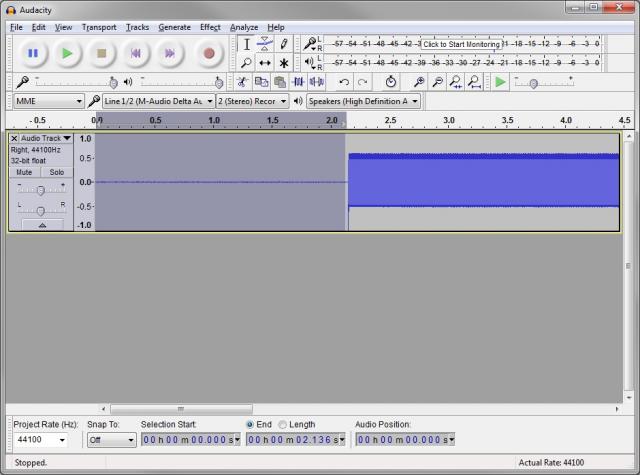
You can now press the record button in Audacity and press any key on the ZX Spectrum. After the saving is finished you will end up a multi-track recording for the left and right channel.
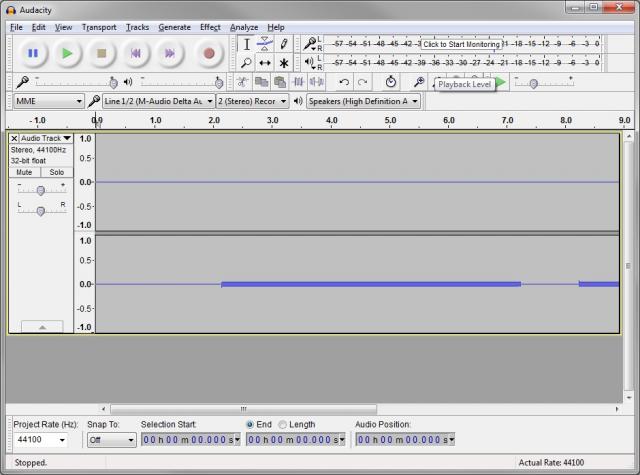
Apparently we will need to get rid of the channel that did not receive any input. To do that click on the arrow next to the audio track and select "Split Stereo Track". This will allow you to delete the empty track.
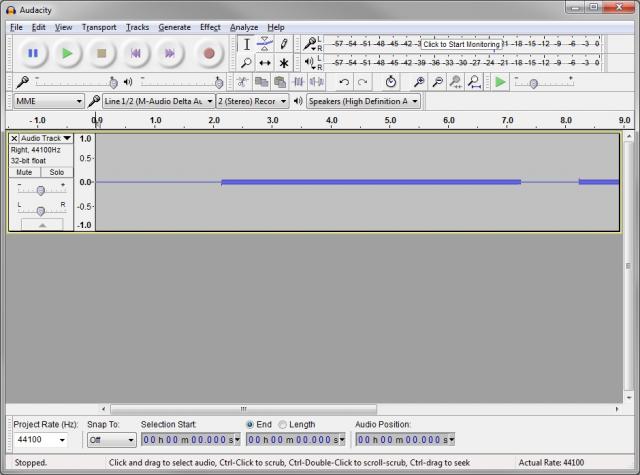
Now press the cross next to the "Audio Track" button inside the left track that is marked yellow. It will delete the track. We will end up with a screen looking like the screenshot below.
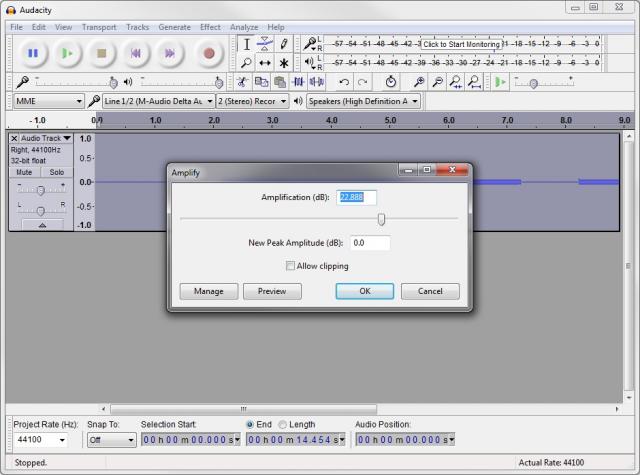
Because the signal was weak we will need to amplify our recording. To do that go the the "Effect" menu and click on "Amplify...". You will be prompted with a question on how much you want to amplify it. Just select the default, as it is set to the maximum amplification. In our case it will be 22.888 dB.
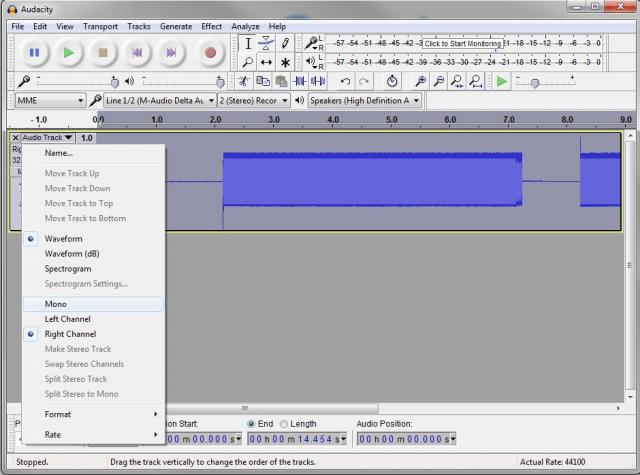
After the amplification process is finished we need to change the output of the track to mono, otherwise the ZX Spectrum will not receive any data. If you skip this step, you will be not able to load the saved data. Click on the "Audio Track" menu and select "Mono".
Between the time of pressing record inside Audacity and a key on the ZX Spectrum keyboard we recorded some silence. We can get rid of this by selecting it inside the track and pressing the "delete" button on the keyboard.
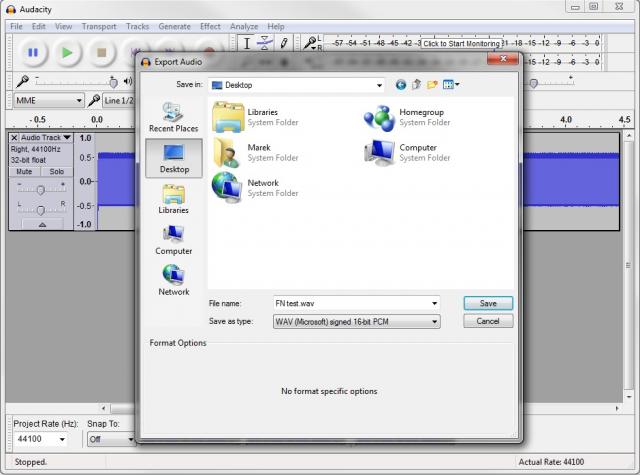
We are ready to export the track and save it as a WAVE file. Go to "File -> Export Audio..." and select the file type WAV (Microsoft) signed 16-bit PCM. Name the file something like "FN test.wav".
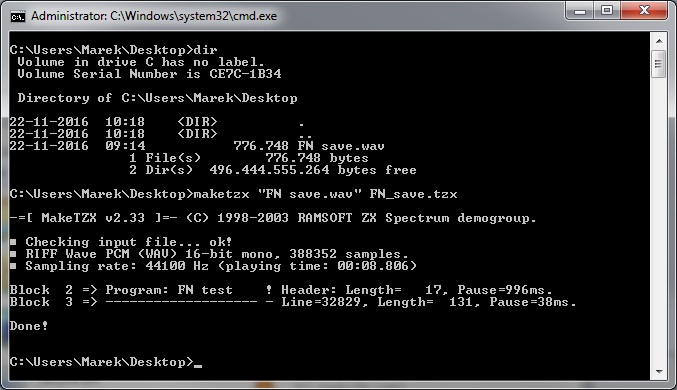
At this point we have successfully created a save file of our ZX Spectrum program. We can choose to leave it at that and just load our program back into the ZX Spectrum from this WAV file or we can continue a step further which will be to create a TZX file. This is basically an image of the WAV file which is understood by ZX Spectrum emulators and some other programs. To achieve that we need a command line program called maketzx.exe created by Ramsoft. There is also a GUI version, but I couldn't get it to work properly and decided to do it hardcore inside the command line. I have added the path of maketzx.exe file to my system path and typed this command inside the folder containing the WAV file.
maketzx "FN save.wav" FN_save.tzx
To test it I have used Fuse ZX spectrum emulator which is free. The Windows version associates TZX file extension to the program and you can just double click to open it.
To finish we are going to load our program back into ZX Spectrum. You can do this by using Audacity or other application that knows WAV files and just play it back. But we can also use the TZX file with an application called Tapir, which will generate audio wave out of the image file. This way you don't need to keep large audio files, but just the small TZX files. Start up the program and select "Left" menu item. There you can load up your TZX image file.

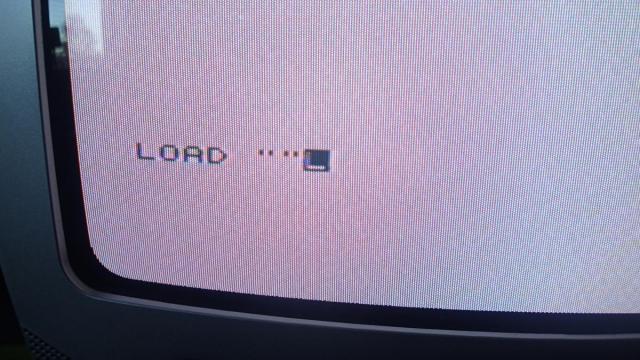
In order to load up the program on the ZX Spectrum just type LOAD "" and press ENTER. Tell Tapir to play our FN_save.tzx file.