Raspberry Pi is an ideal device to setup a complete stack of software that is needed to run a home automation system. In this blog I will cover installation and configuration of Raspberry Pi Server with MQTT broker, in combination with Sonoffs running Tasmota firmware.
In my previous blog I have written about how to flash a Sonoff switch with custom Tasmota firmware. Although it gives you the freedom to control the switches and configure timers that are way better then the ones provided by the eWeLink app, you are somehow limited to the functionality provided inside the firmware. It is not possible to create dependencies between your IoT devices and you are not able to write your own scripts that can give you ultimate control over them. It is also impossible to securely access the switch directly from the internet. Tasmota offers configuration for a web admin password, but you are still sending the password unencrypted over HTTP connection.
I this blog I will focus on installation and configuration of a Raspberry Pi Server, MQTT broker and an Android app that will let you control your Sonoff switches and other IoT devices connected to your network.
To start we need to install and configure Raspbian Stretch Lite on a Raspberry Pi 3.
1. Visit the Raspberry Pi website and download the image of Rasibain Stretch Lite.
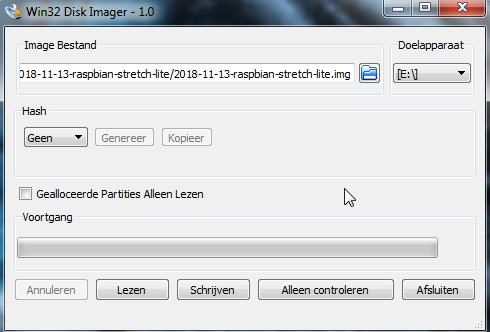
2. Write the Raspbian image on a microSD card. If you are using Windows then you can use Win32 Disk Imager. Make sure the SD card is FAT32 formatted.
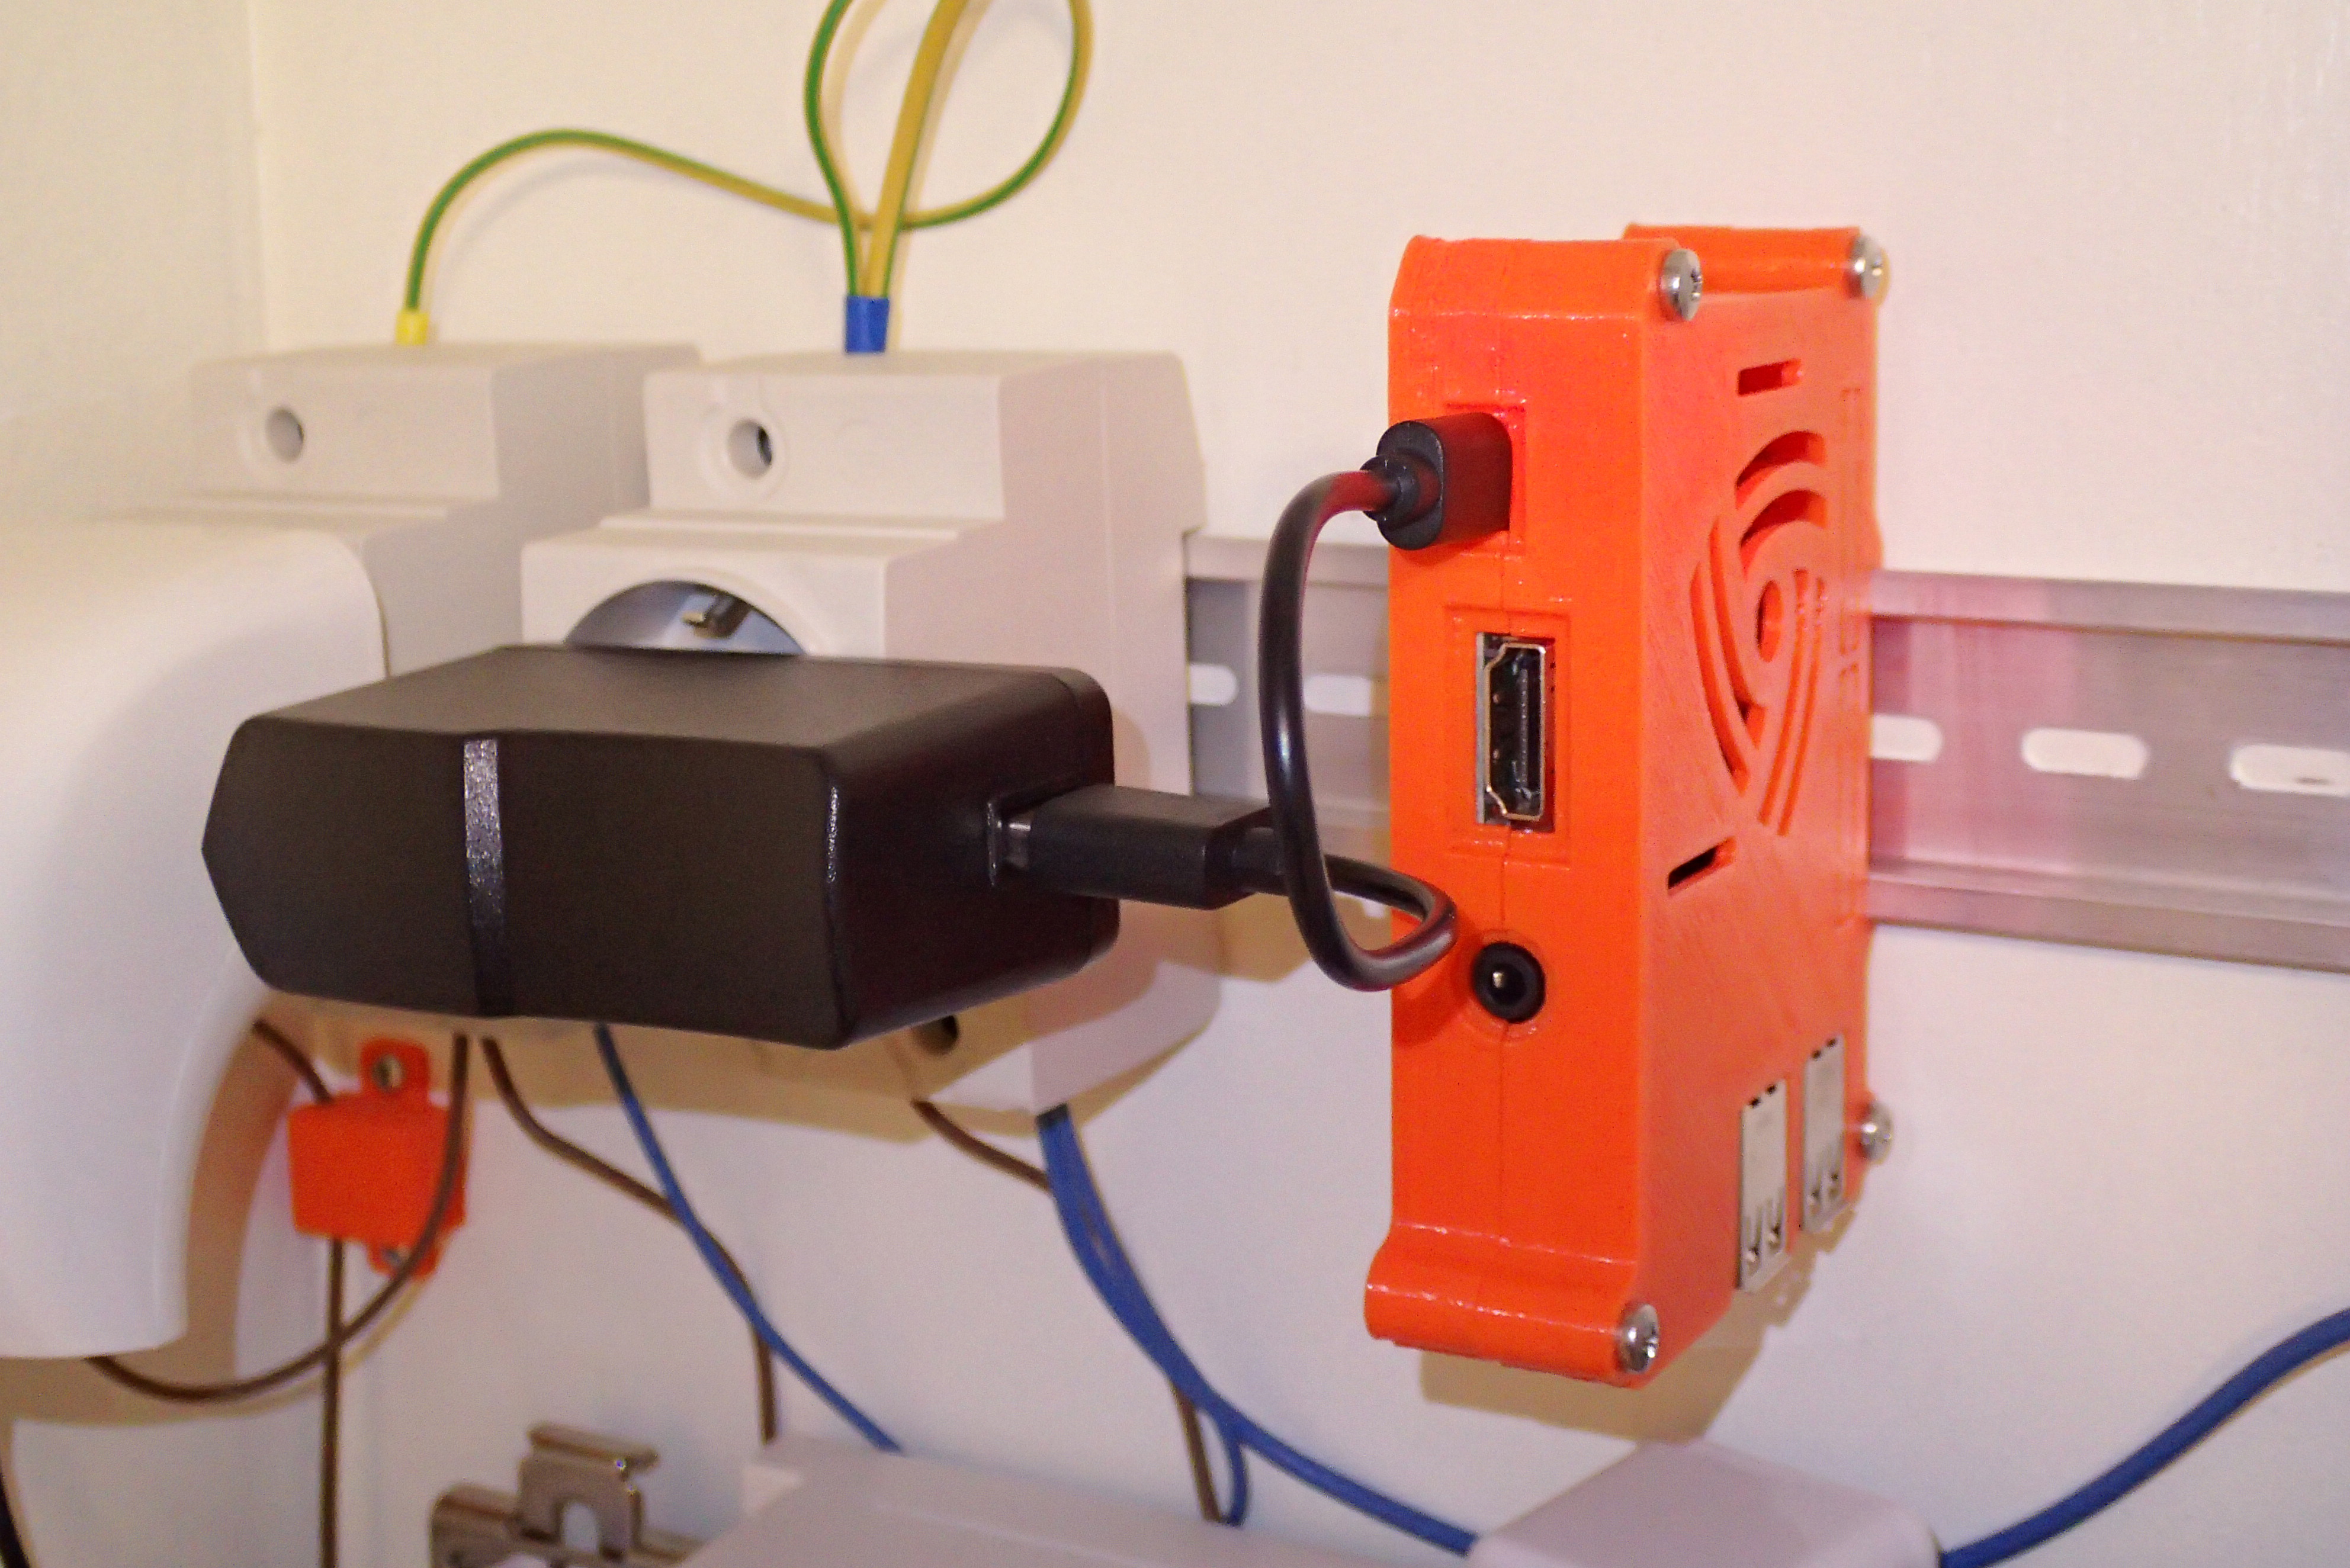
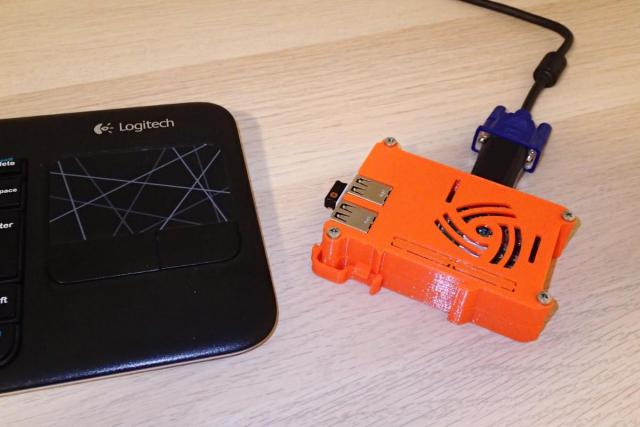
3. Connect you Raspberry Pi to a screen with keyboard. For enclosure I have used a 3D printed design with a DIN rail connection.
4. After booting you can login to Raspbian with user pi and password raspberry. Now we can configure the system to our needs.
First type:
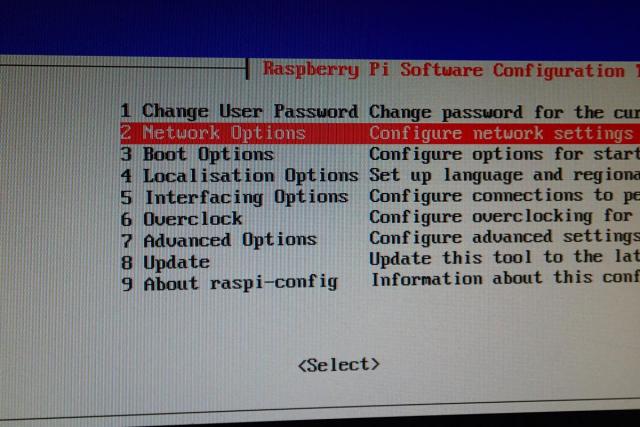
sudo raspi-config
and you will be shown a configuration screen. It is best to start with changing the default password for your pi user to something more secure. This can also be done in the terminal with the command passwd.
If you are running on WiFi then inside the Network Options you can specify your WiFi router name and password. The WiFi credentials are stored inside /etc/wpa_supplicant/wpa_supplicant.conf file:
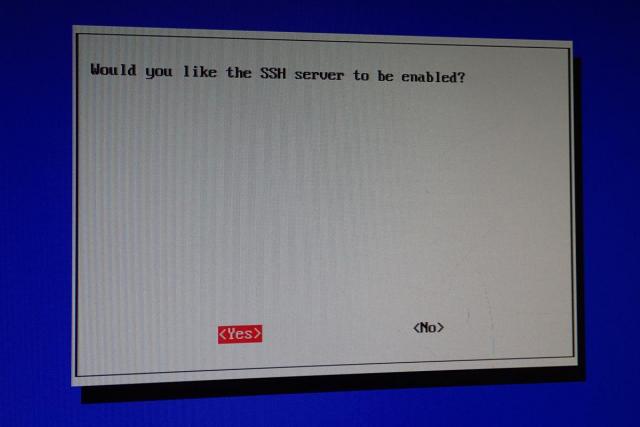
It is also a good idea to enable SSH server, so you will be able to login to the system after disconnecting the monitor. This option can be enabled inside menu item number 5. Interfacing Options -> SSH.
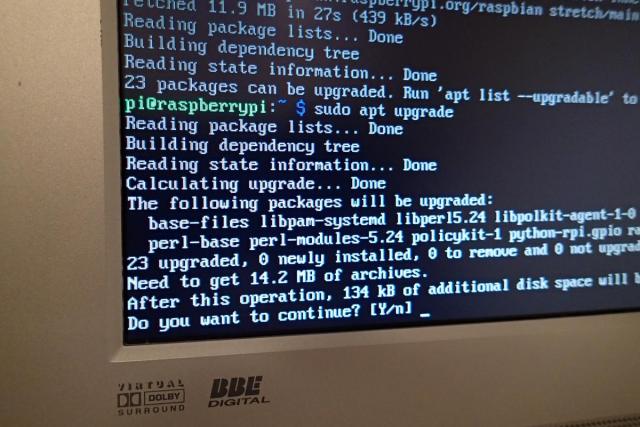
Now you can run these commands to patch your system to the latest versions:
sudo apt update
sudo apt upgrade
You will also need to setup a static IP address. The configuration files can be only edited as root user, so you will need to login with sudo su command as root. Then edit the configuration file with:
nano /etc/dhcpcd.conf
Uncomment and change the lines that are shown below. In my case the router runs on 192.168.0.1 and the Raspberry Pi server is connected to interface wlan0 with IP 192.168.0.3. Make sure you use correct values for your setup.
# Example static IP configuration:
interface wlan0
static ip_address=192.168.0.3/24
static routers=192.168.0.1
static domain_name_servers=192.168.0.1 8.8.8.8

# It is possible to fall back to a static IP if DHCP fails:
# define static profile
profile static_wlan0
static ip_address=192.168.0.3/24
At this point we are finished with the configuration of the Raspbian system. Now you can type sudo reboot and your IP configuration will be changed to your new static IP.
I found this interesting command line tool to check your WiFi signal strength. It is called iwconfig. Install it with sudo apt iwconfig and you will be able to see the signal level in dBm for your connection.
pi@raspberrypi:~ $ iwconfig

wlan0     IEEE 802.11  ESSID:"pppower_ext"
          Mode:Managed  Frequency:2.422 GHz  Access Point: 80:3F:5D:BA:C2:AE
          Bit Rate=65 Mb/s   Tx-Power=31 dBm
          Retry short limit:7   RTS thr:off   Fragment thr:off
          Power Management:on
          Link Quality=70/70  Signal level=-19 dBm
          Rx invalid nwid:0  Rx invalid crypt:0  Rx invalid frag:0
          Tx excessive retries:1  Invalid misc:0   Missed beacon:0
If everything went correctly you can unplug your monitor and connect with ssh to your Rapsbian server to continue the configuration of the MQTT server from there.
MQTT server (or broker) is responsible for sending and receiving messages (called topics) between Internet Of Things devices. I have chosen to use Mosquitto MQTT broker. Install it with:
sudo apt install mosquitto mosquitto-clients
This will also install Mosquitto clients that will let your publish (send) and subscribe (receive) MQTT topics (messages).
To test it start 2 terminal windows and type inside the first one :
mosquitto_sub -h localhost -t mytesttopic
and in the other one:
mosquitto_pub -h localhost -t mytesttopic -m "enable"
The subscriber window should be able to receive the published topic with the value of "enable". This is the basic idea what happens when someone or something presses a button of a Sonoff switch. Instead to mytesttopic sonoff is sending the message stat/sonoff/POWER with the value of ON.
MQTT broker can also be protected with username and password. In order to do that run this command and specify a password.
sudo mosquitto_passwd -c /etc/mosquitto/passwd mqttuser
The user can be any name, it does not need to be present as a Raspbian user. To complete the setup create this file:
sudo nano /etc/mosquitto/conf.d/default.conf
and paste the contents listed below inside it.
allow_anonymous false
password_file /etc/mosquitto/passwd
To test the publish and subscribe commands you need to add -u "mqttuser" -P "password" at the end of the mosquitto_pub and mosquitto_sub commands.
If you are planning to access the MQTT server outside of your network. For example with an MQTT Dash App on your smartphone, it is wise to setup SSL certificates. With Let’s Encrypt you can do this for free. What we need is just to install a tool called certbot that will fetch us the certificate.
sudo apt-get install certbot
Certbot tool uses port 80 or 443 to verify if you are the owner of your domain before it can issues the certificate. In order to complete the next step, make sure you have port 80 unblocked and forwarded to your Raspberry Pi. The certificate should be saved inside /etc/letsencrypt/* folder.
sudo certbot certonly --standalone --preferred-challenges http-01 -d mqtt.yourdomain.com
The certificate from Let's Encrypt are only valid for 3 month, so we need to setup a cron job to automatically renew it. Edit the crontab job with the command:
sudo crontab -e
Then add this line. It will request the let's encrypt server every day to check if the certificate is due for renewal.
15 4 * * * certbot renew --noninteractive --post-hook "systemctl restart mosquitto"
By default MQTT runs on port 1883, but for SSL it is 8883. We need to configure this in Mosquitto local configuration file:
sudo nano /etc/mosquitto/conf.d/default.conf
Place the contents of this file to setup port 8883 with the use of certificates.
listener 1883

listener 8883
certfile /etc/letsencrypt/live/mqtt.yourdomain.com/cert.pem
cafile /etc/letsencrypt/live/mqtt.yourdomain.com/chain.pem
keyfile /etc/letsencrypt/live/mqtt.yourdomain.com/privkey.pem
Add a firewall rule for port 8883 to the IP of your Raspberry Pi in your router and then use the mosquitto debug command like above, but now including the secure port and certificate to check if you can subscribe:
mosquitto_pub -h mqtt.yourdomain.com -t mytesttopic -m "encrypted" -p 8883 --capath /etc/ssl/certs/ -u mqttuser -P password
and publish messages to topics:
mosquitto_sub -h mqtt.yourdomain.com -t mytesttopic -p 8883 --capath /etc/ssl/certs/ -u mqttuser -P password
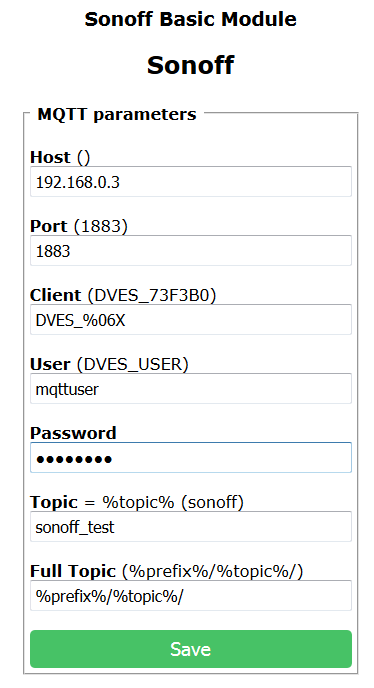
We can now proceed to configure our Sonoff switch to use MQTT. Provide the values for Host, Port and your mqtt user with password which we created before. You can also change the topic name for your switch as it will uniquely identify it inside your MQTT infrastructure. Notice that we are not (and can not) specify secure port inside the Sonoff, but it is not necessary as the messages from the secure port (8883) will be automatically re-routed to the 1883 port.
To test the settings we can use the Mosquitto client commands. Type the command below and press the button on your Sonoff.
mosquitto_sub -h mqtt.yourdomain.com -t stat/sonoff_test/POWER -p 8883 --capath /etc/ssl/certs/ -u mqttuser -P password
If everything is configured correctly, there should be ON or OFF text appearing inside your terminal window. Subscribing to the topic on the unsecure port should give the same results:
mosquitto_sub -h localhost -t stat/sonoff_test/POWER -u mqttuser -P password
We can also turn the switch ON of OFF with the publish command:
mosquitto_pub -h mqtt.yourdomain.com -t cmnd/sonoff_test/power -m "ON" -p 8883 --capath /etc/ssl/certs/ -u mqttuser -P password
And the same works on the unsecure port:
mosquitto_pub -h localhost -t cmnd/sonoff_test/power -m "OFF" -u mqttuser -P password
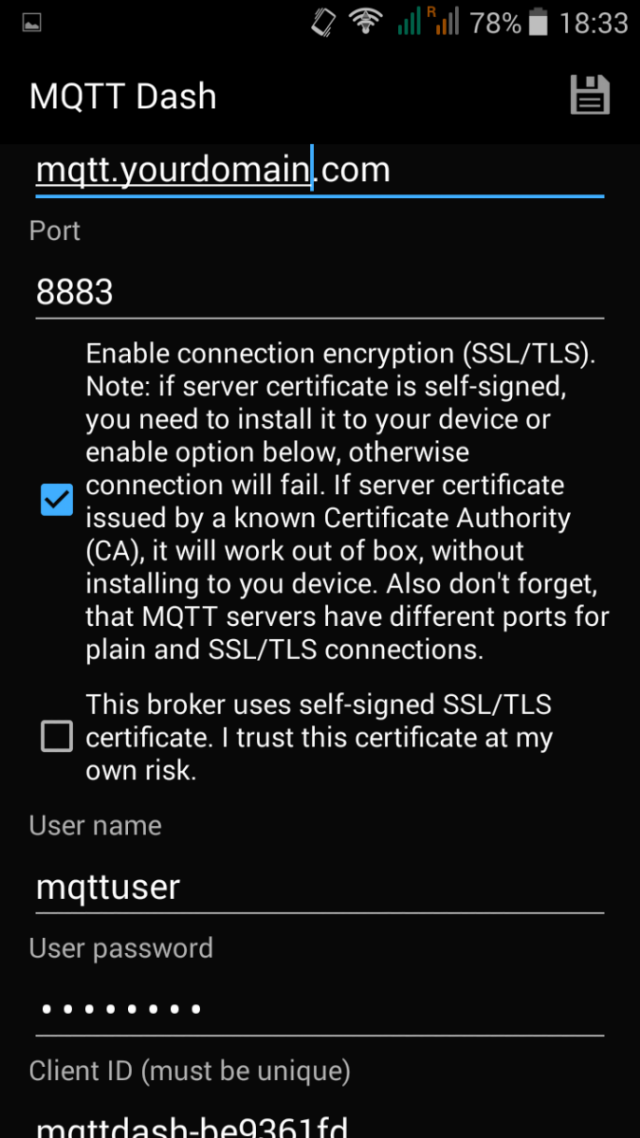
It is not very convenient to turn the switch on or off on the terminal window, luckily there exist smartphone apps that will let your publish and receive MQTT messages. For example the MQTT Dash app. What I find nice about this app, is that it lets you create a secure connection using a certificate.
First you need to create this connection.
Then you can proceed to crating the switch controller. It seems to be possible to send 1 or 0 instead of ON and OFF messages. I didn't know this until testing it inside this app.
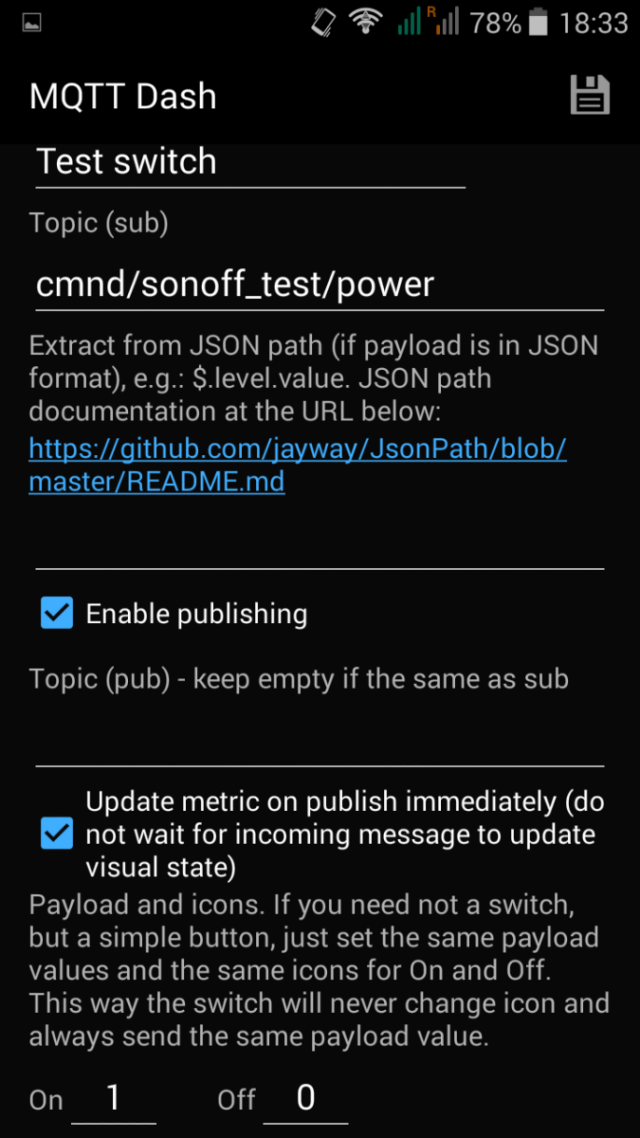
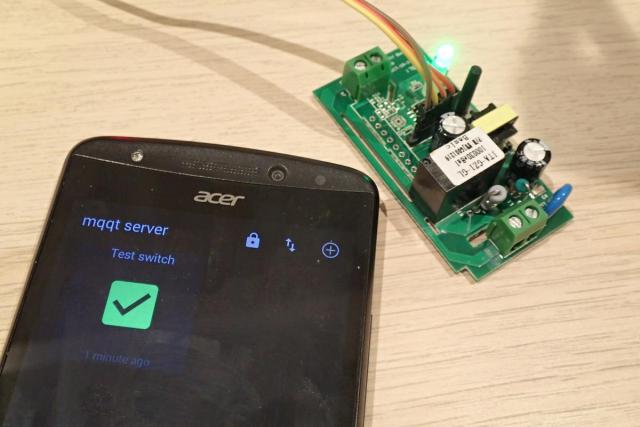
At the end you will get a nice switch that you can tap to toggle the output your Sonoff.
This tutorial should get you started in the amazing world of IoT. Although you have to beware for the Internet Of Stings or Spies, Cheaters and Telemarketers (as Richards Stallman calls them) with small effort we are able to take full control of those devices by ourselves.