If you are a Trekkie, then you must remember the door chime that is played when someone wants to enter a quarters. In this blog I will describe how to create such a doorbell using Arduino Nano and some extra modules.
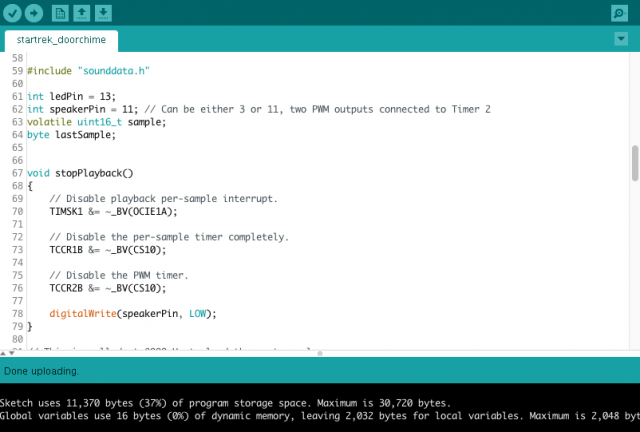
To start we are going to use an existing Arduino Playground code that is designed to play a 8KHz PCM sample and let it play your favourite sample. Start to create an Arduino project using these files. Create a new Arduino project and paste in the contents of the main program. Then add a new file to the same directory called sounddata.h, this file we will later change with data that contains your sample. First build this project and upload it to your Arduino Nano.
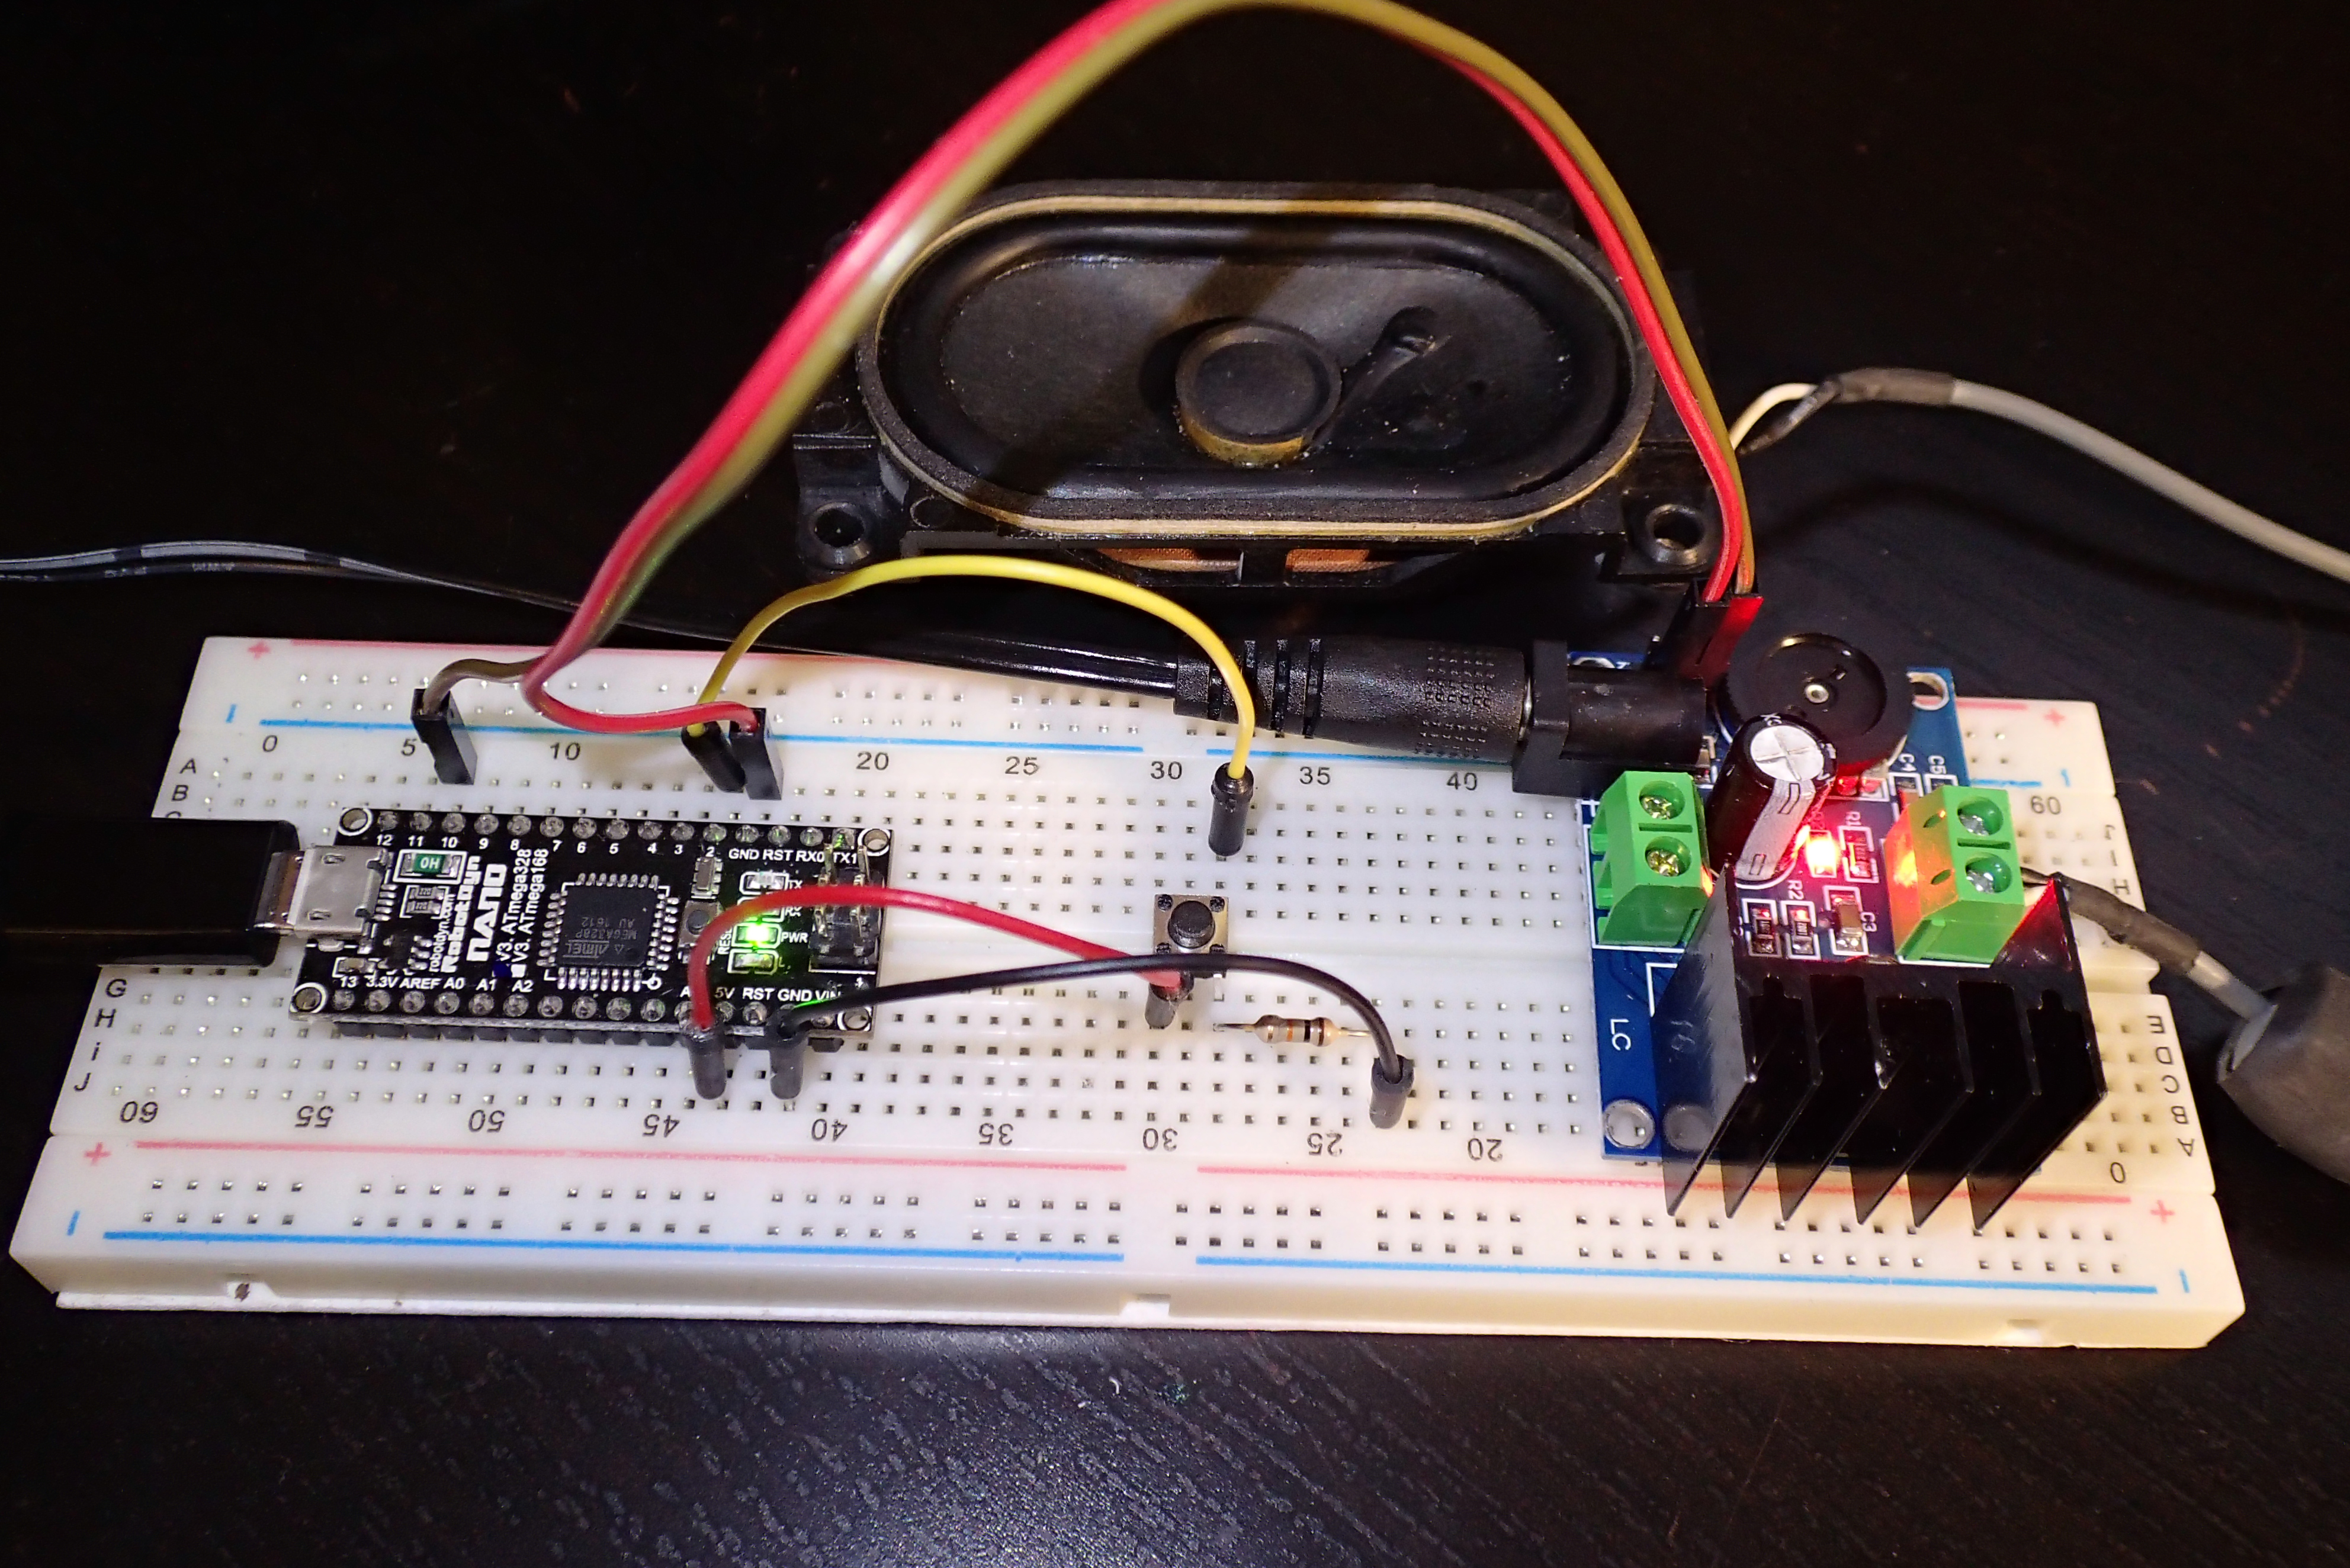
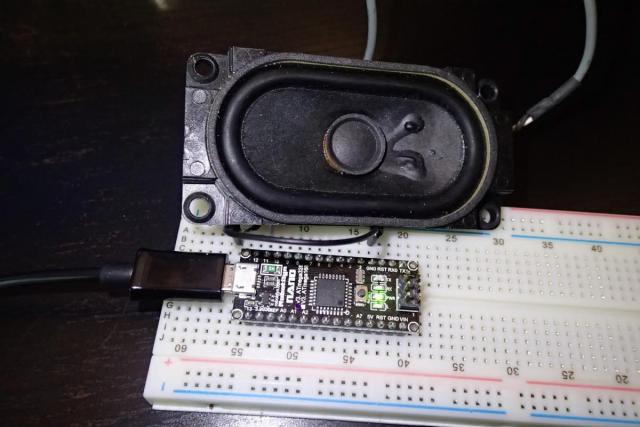
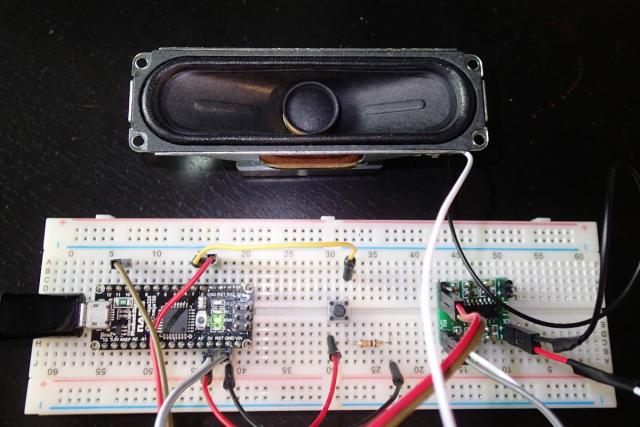
We see above that pin 11 is used as the output to the speaker. The other speaker pin connects to ground. We will create a test setup on a breadboard to see if we will get this sound played. The data included in the project is the Mac booting sound. It should play directly after the sketch is uploaded.
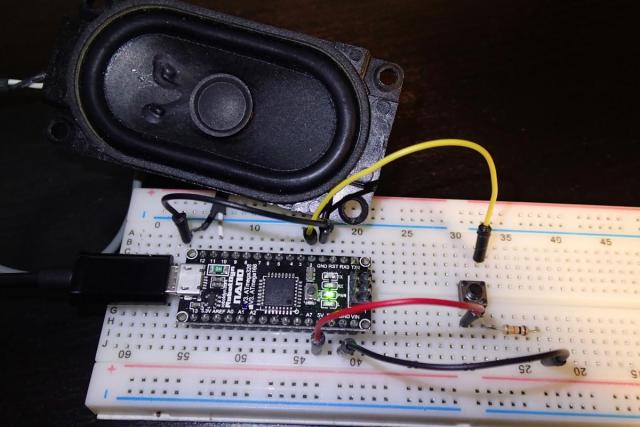
Following this Arduino tutorial page we will add a button to our circuit that will trigger the sound. The schematic on the tutorial pages uses a simple pull-down resistor.
We will also need to change some code in our project. First we will add an interrupt handling for our button, and add some code that will deal with the button bounce.
On top of the page add the definitions for our button. The button will be connected to pin 2.
int buttonPin = 2;
int buttonState = 0;
From the loop() function remove the while(1) command. It should look like this:
void loop()
{
  // Nothing here!
}
From the setup() remove the playSound() funcion and add attachInterrupt(0, pin_ISR, CHANGE) event handler for our button.
void setup()
{
    pinMode(ledPin, OUTPUT);
    pinMode(buttonPin, INPUT);
    attachInterrupt(0, pin_ISR, CHANGE);
}
Now add the button handler that includes a debounce function that will ignore button presses that happens quicker than 200ms.
void pin_ISR() {

  static unsigned long last_interrupt_time = 0;
  unsigned long interrupt_time = millis();

  buttonState = digitalRead(buttonPin);

  // If interrupts come faster than 200ms, assume it's a bounce and ignore
  if (interrupt_time - last_interrupt_time > 200 && buttonState == HIGH)
  {
    // Turn LED on
    digitalWrite(ledPin, buttonState);
    // Play the sound
    startPlayback();
  }

  if (buttonState == LOW) {
    // Turn LED off
    digitalWrite(ledPin, LOW);
  }

  last_interrupt_time = interrupt_time;
}
Now we can change the sound to your favourite sample. To do this we will need to convert the sound to a 8000Hz, mono, unsigned PCM format. For this purpose we can use Sound eXchange (SoX) utility. After you have it installed you can execute this command to convert the file to our desired format.
/sox ../doorbell.wav -c 1 -r 8000 -e unsigned-integer doorbell_8k_8bit_u.wav
After this we will need to generate the sounddata include file. This can be done using wav2c tool. There is no executable present and needs to be compiled. If you are running Mac or Linux it is easy by just typing "make" inside the sources folder. This will result in creation of the wav2c executable. Run this command and this tool will generate sounddata.h file, which you can then use to replace the existing one inside the Arduino project.
./wav2c doorbell_8k_8bit_u.wav sounddata.h sounddata
If you are happy with the sound that I have chosen you can download my Arduino project, which already includes the correct version of the sounddata.h file and the changes mentioned above.
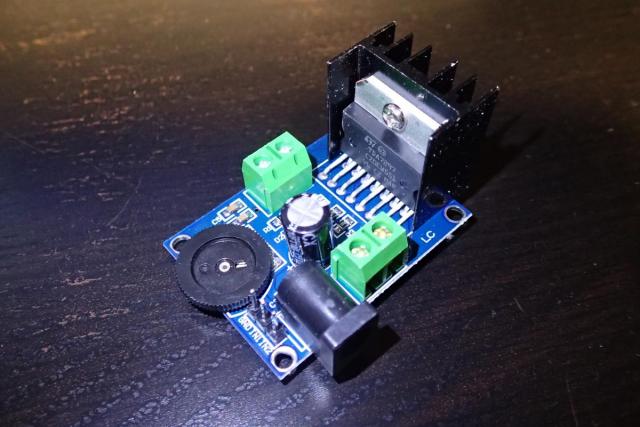
As you probably noticed the volume of the sound that we are generating using a speaker directly connected to an Andruino is not very useful as a doorbell. That's why we need to amplify it. I have found this nice TDA7297 amplifier module. It can be powered by 6-18V. Because the doorbell usually uses 12V, we will be able to adapt it. The amplifier is stereo, but we can also just use one channel.
As an alternative I have tried using this small audio board module that is based on PAM8403 chip. Although it is low power solution it does produce good sound amplification, but I have concluded that for a doorbell the volume is a bit too low.
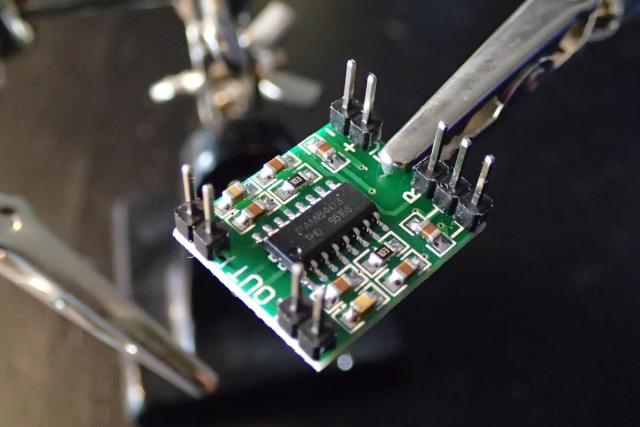
Advantage is that it could be directly connected to the 5V Arduino Nano's output. This was my test setup.
In the next blog I will add some other modules that convert 12V AC from my bell transformer into usable voltages and I will integrate these all the parts into a custom 3D designed and printed housing.